How to use
The following example explain how to use Forms Steps to create a node entity, please note that the following procedure can apply to any fieldable entity type.
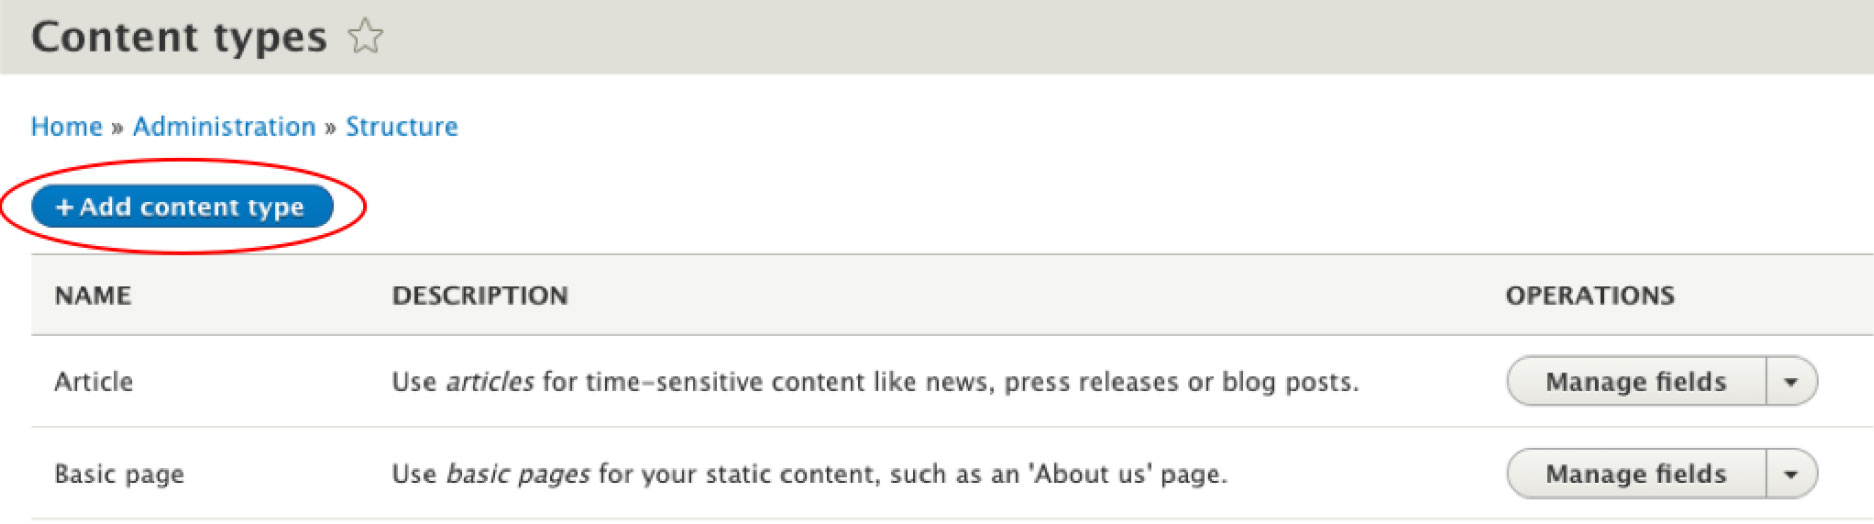
Create custom Content Type
Create your content types if you use anything other than Article or Basic Page to associate it with FormSteps.
Go to Structure > Content Types > Add content type
⇒ /admin/structure/types/add
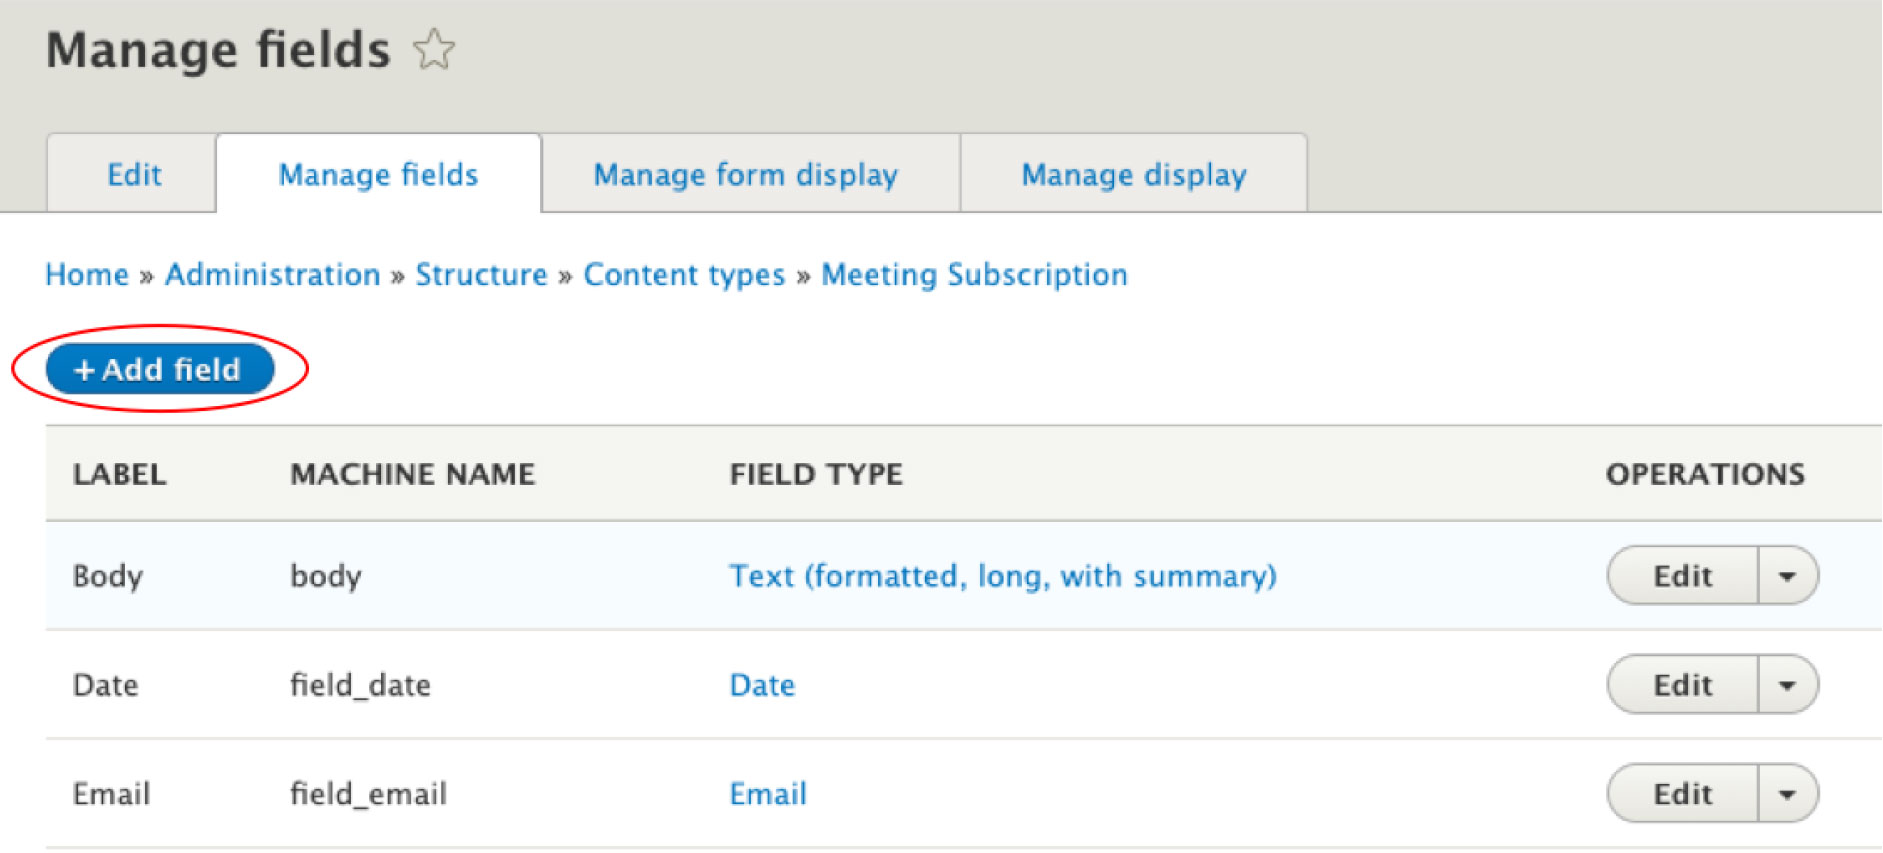
Add to the content type the fields you want to appear in your form.
Example :
We created a new content type “Meeting Subscription” with 3 fields (body, date, email).
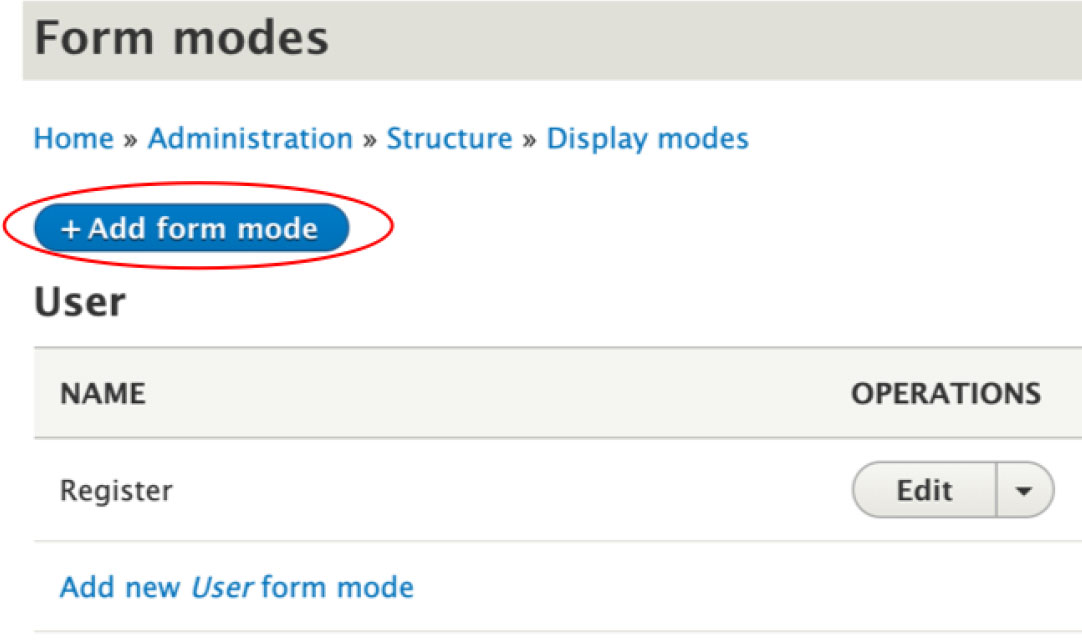
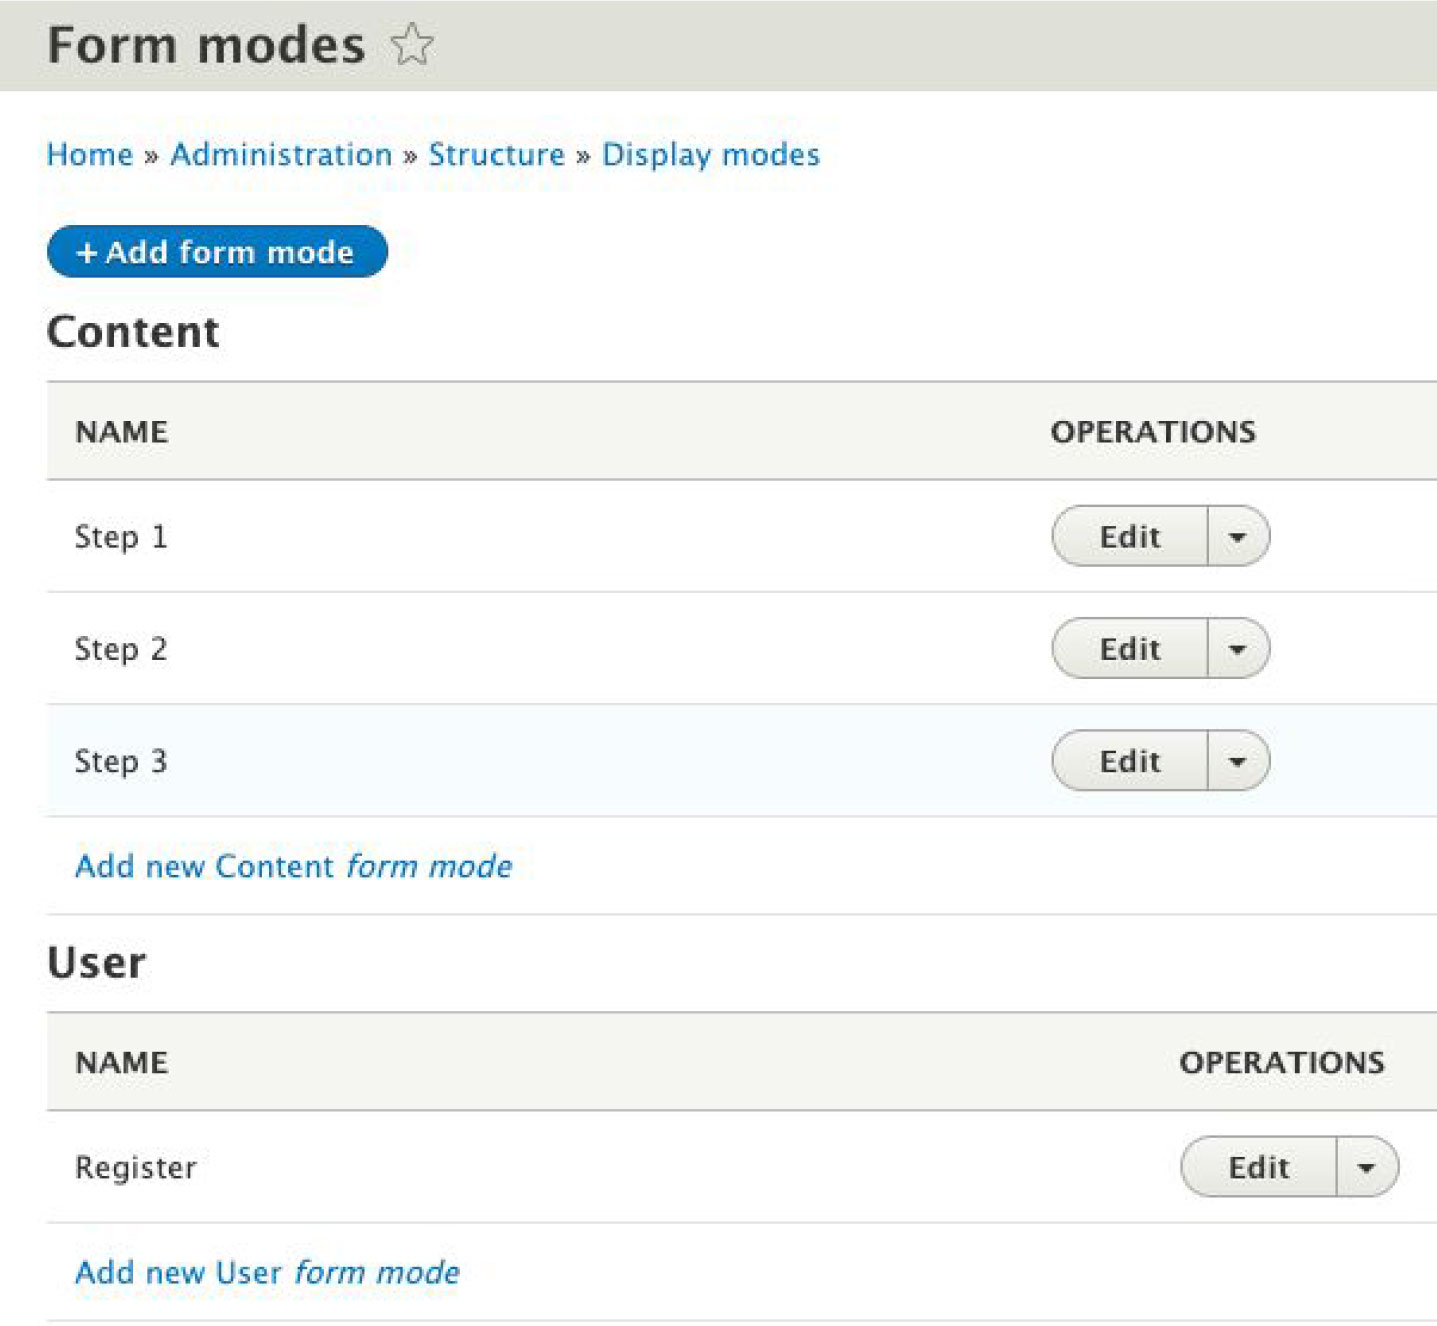
Create Form modes
Each form mode allows you to format a group of form items. It corresponds to a step of your form.
Go to Structure > Display modes > Form modes > Add form mode
⇒ /admin/structure/display-modes/form/add
Then, choose which type of entity your mode form belongs to, and fill in the step name.
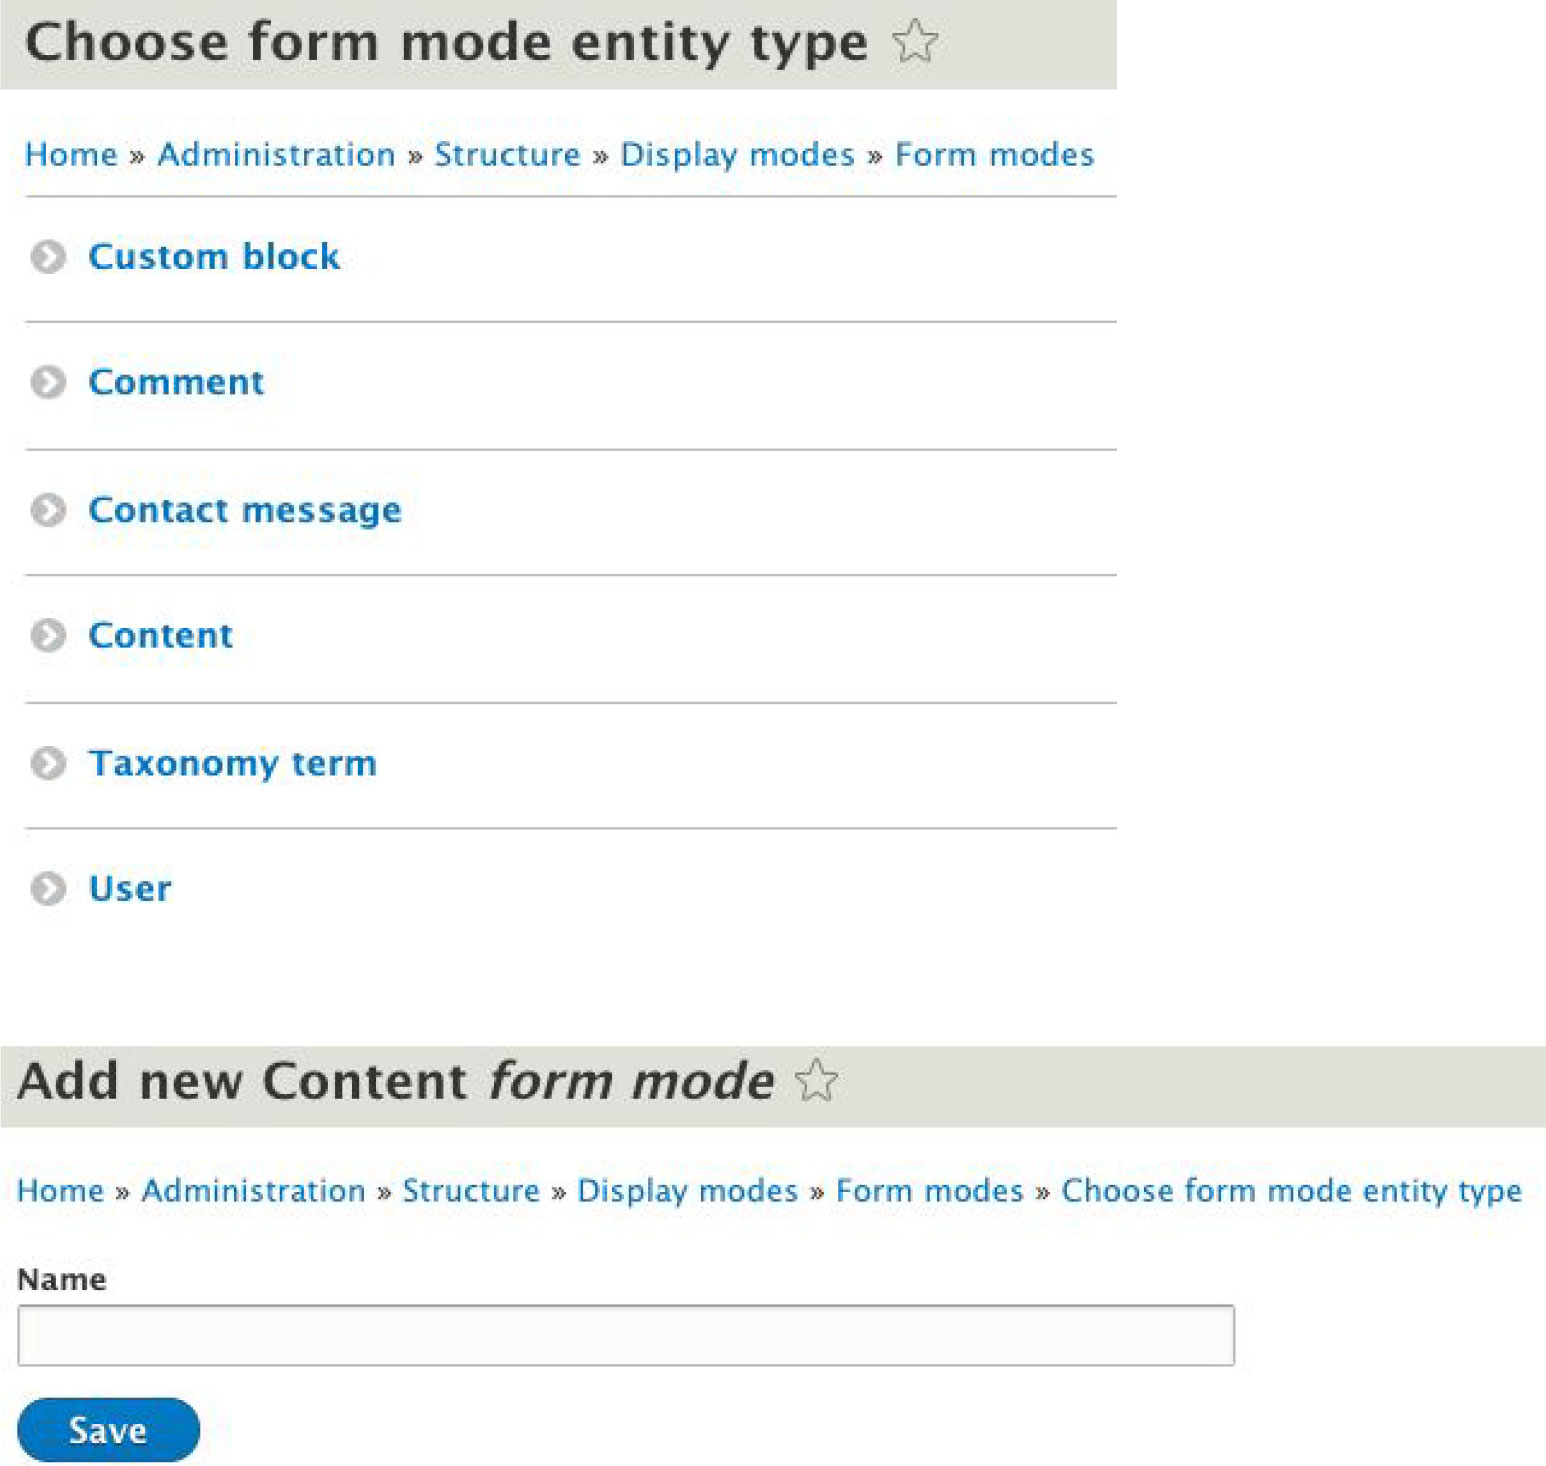
Example :
We added 3 new Content form modes : “Step 1”, “Step 2” and “Step 3”.
Organize fields by step
Go to Structure > Content Types > Manage form display (of the content type concerned)
⇒ /admin/structure/types/manage/*meeting_subscription*/form-display
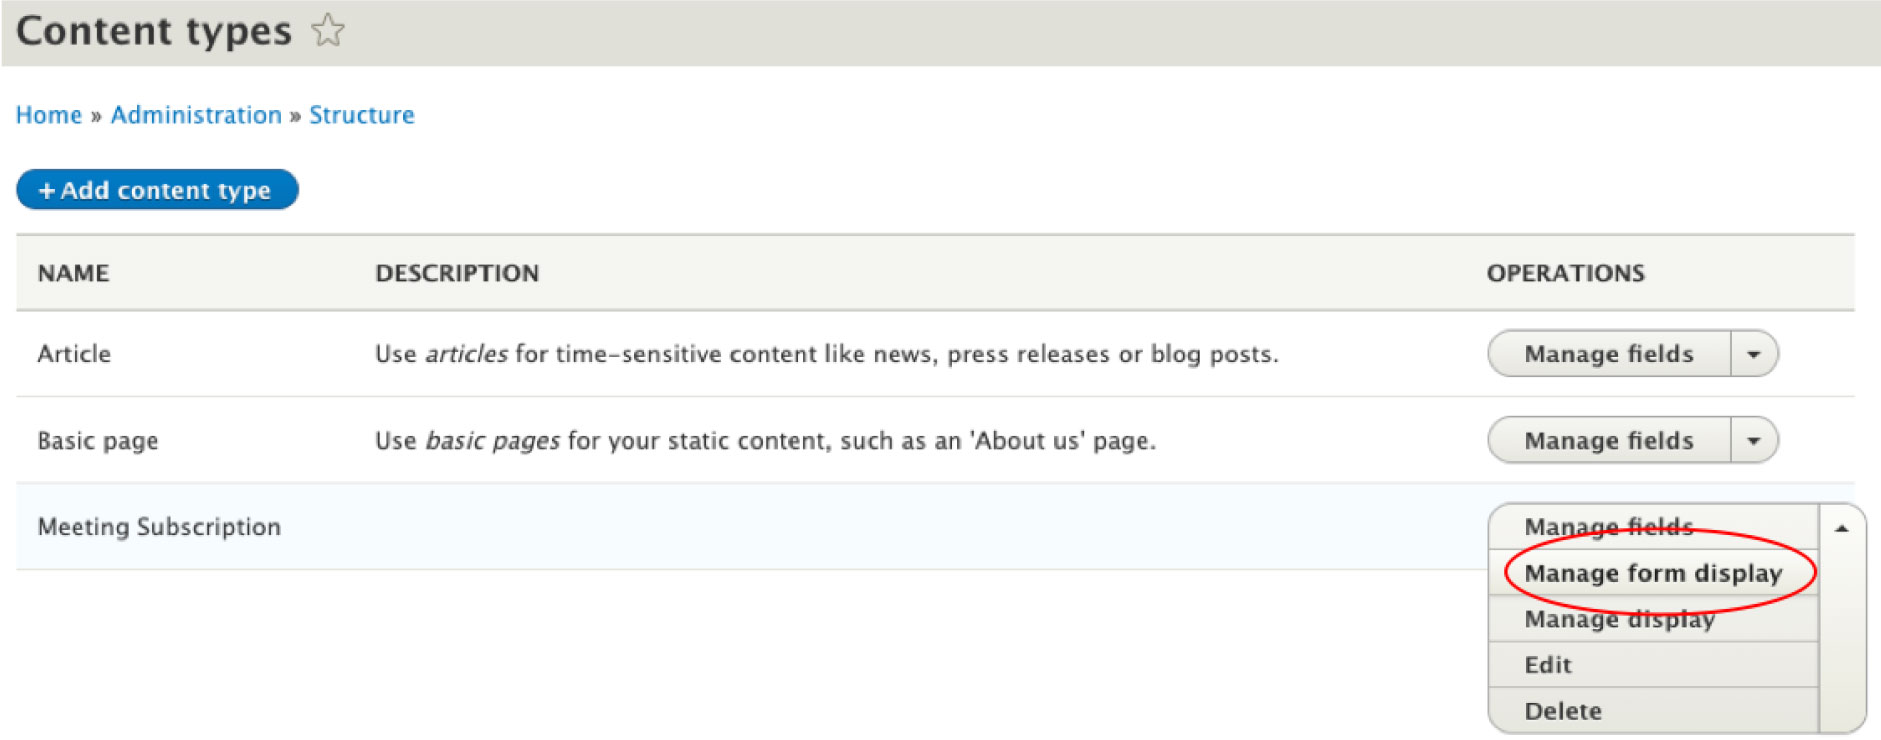
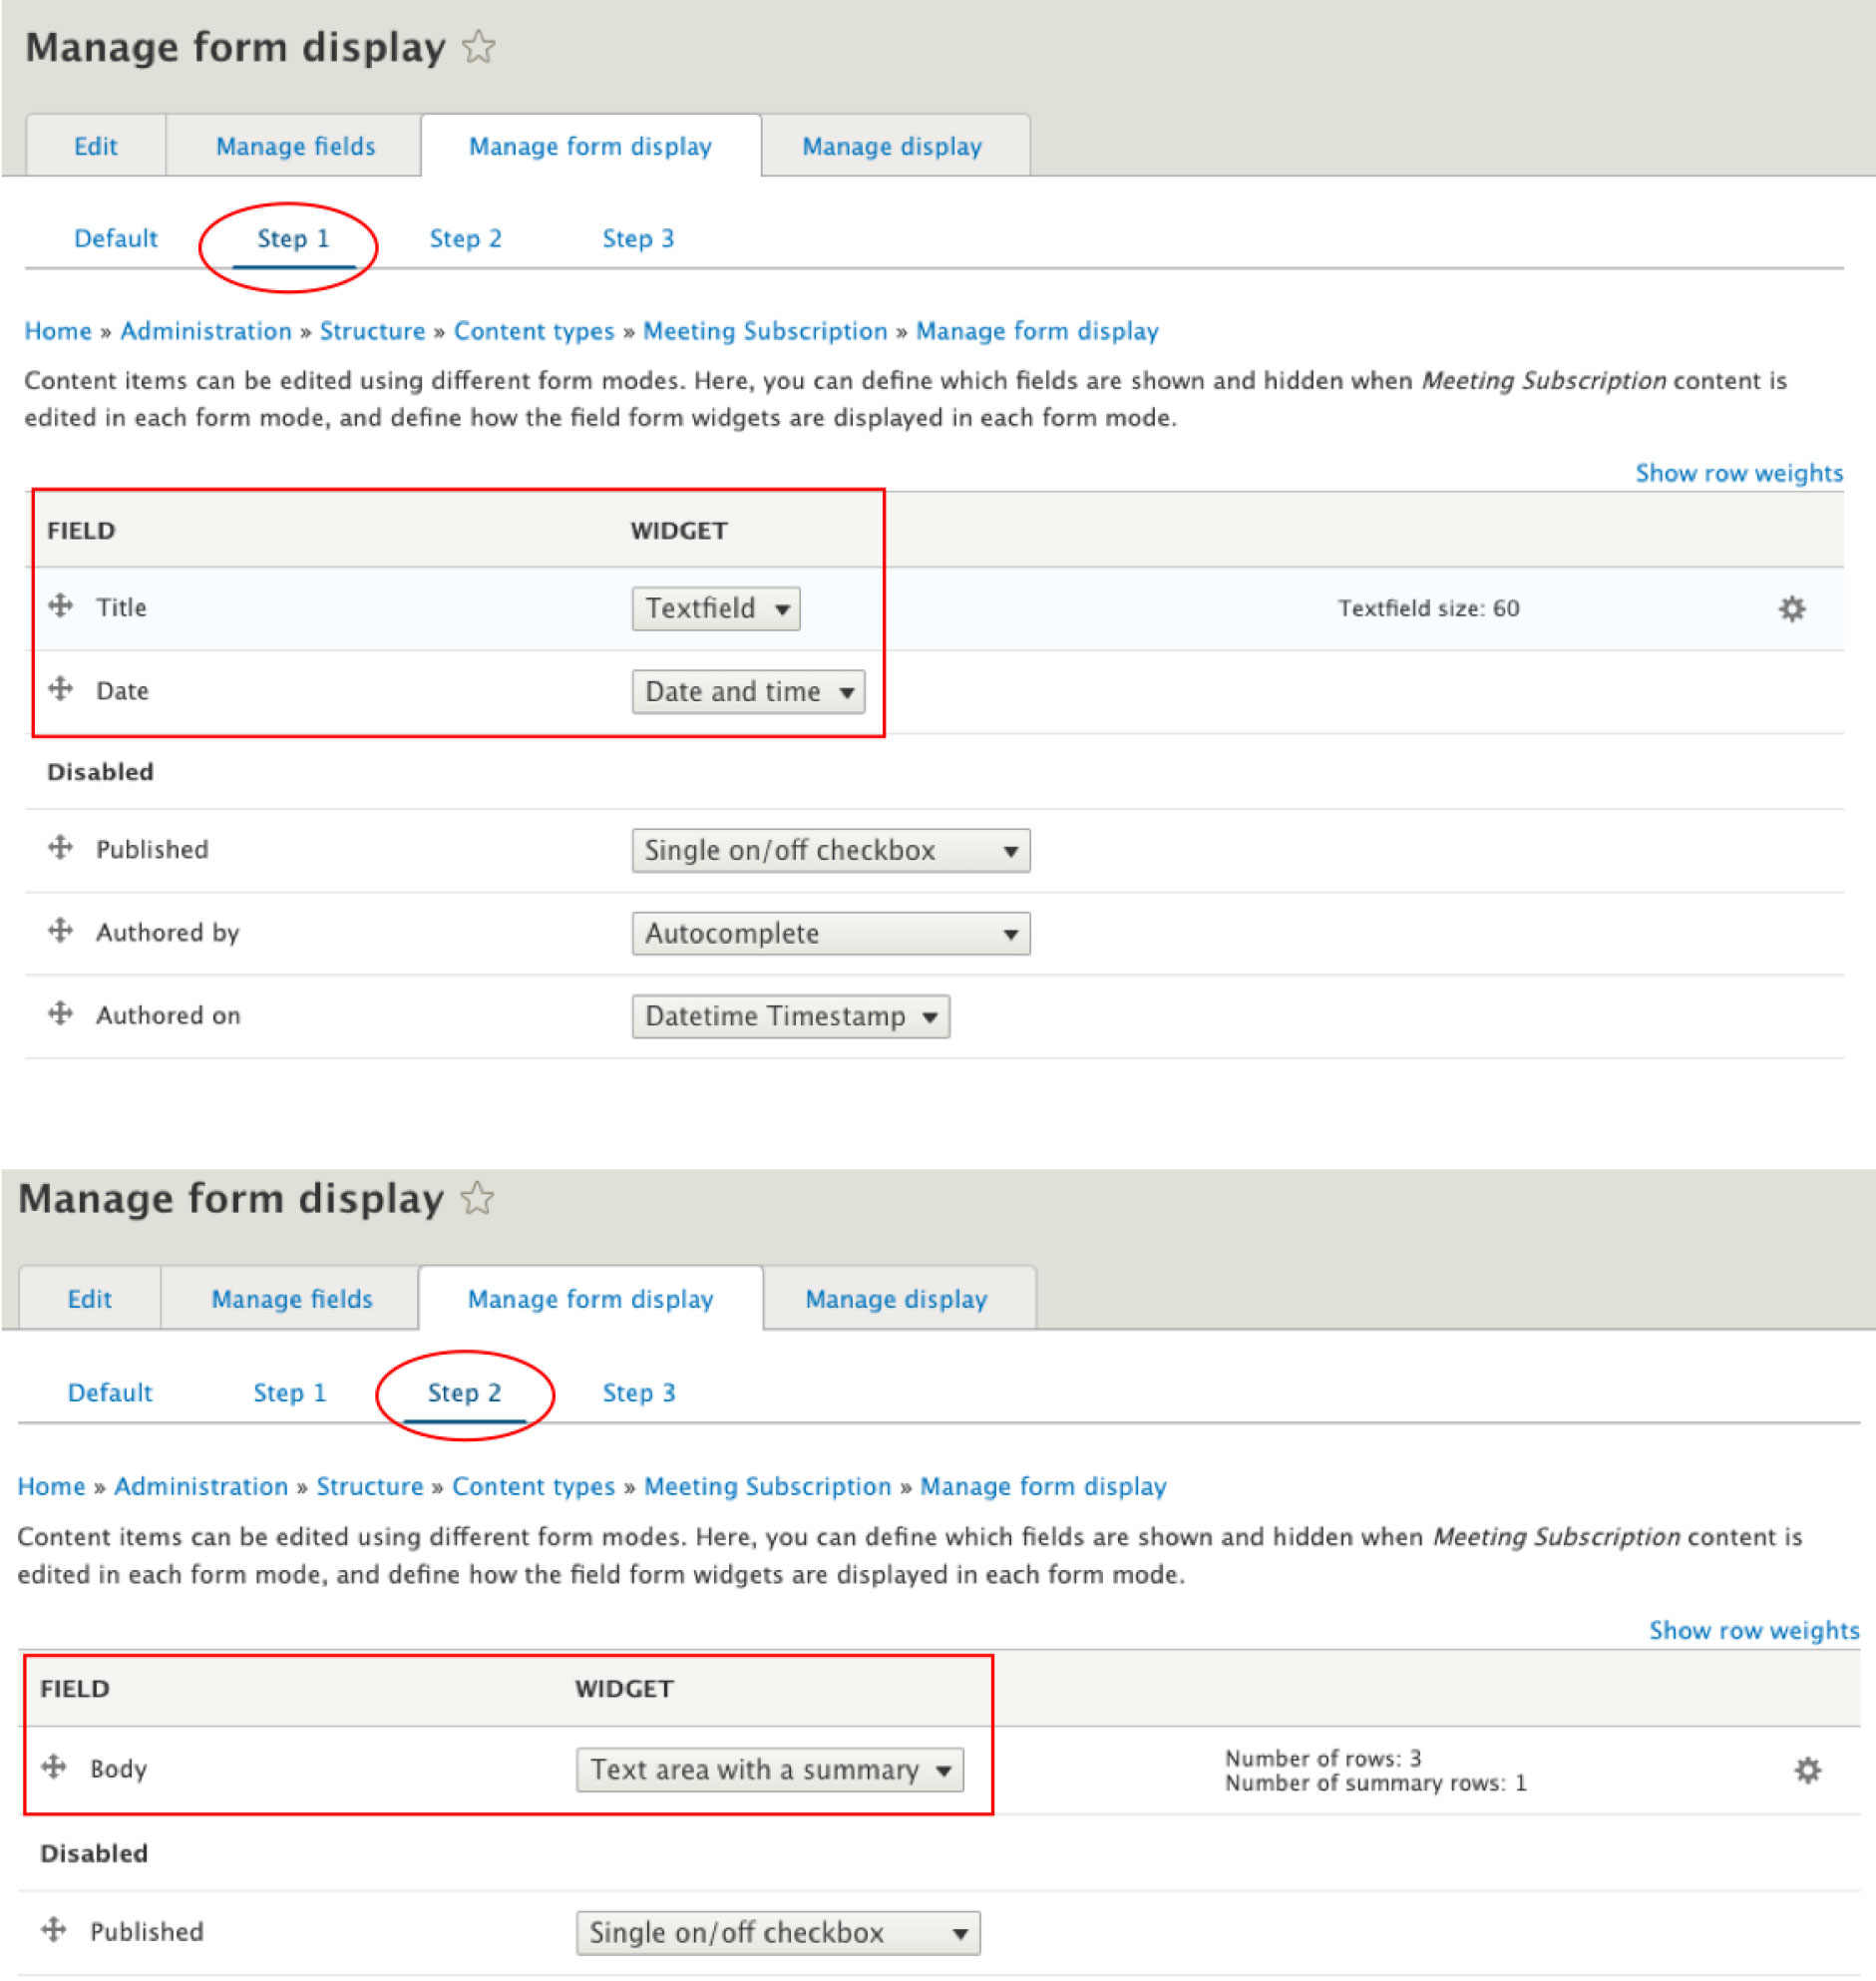
Then, you can divide the fields in the different form modes.
You can define which fields are shown in each form mode, and define how the field form widgets are displayed in each form mode.
Example :
Only the title and date fields will be displayed on step 1 of the form. The body will be the only field to fill on step 2 of the form.
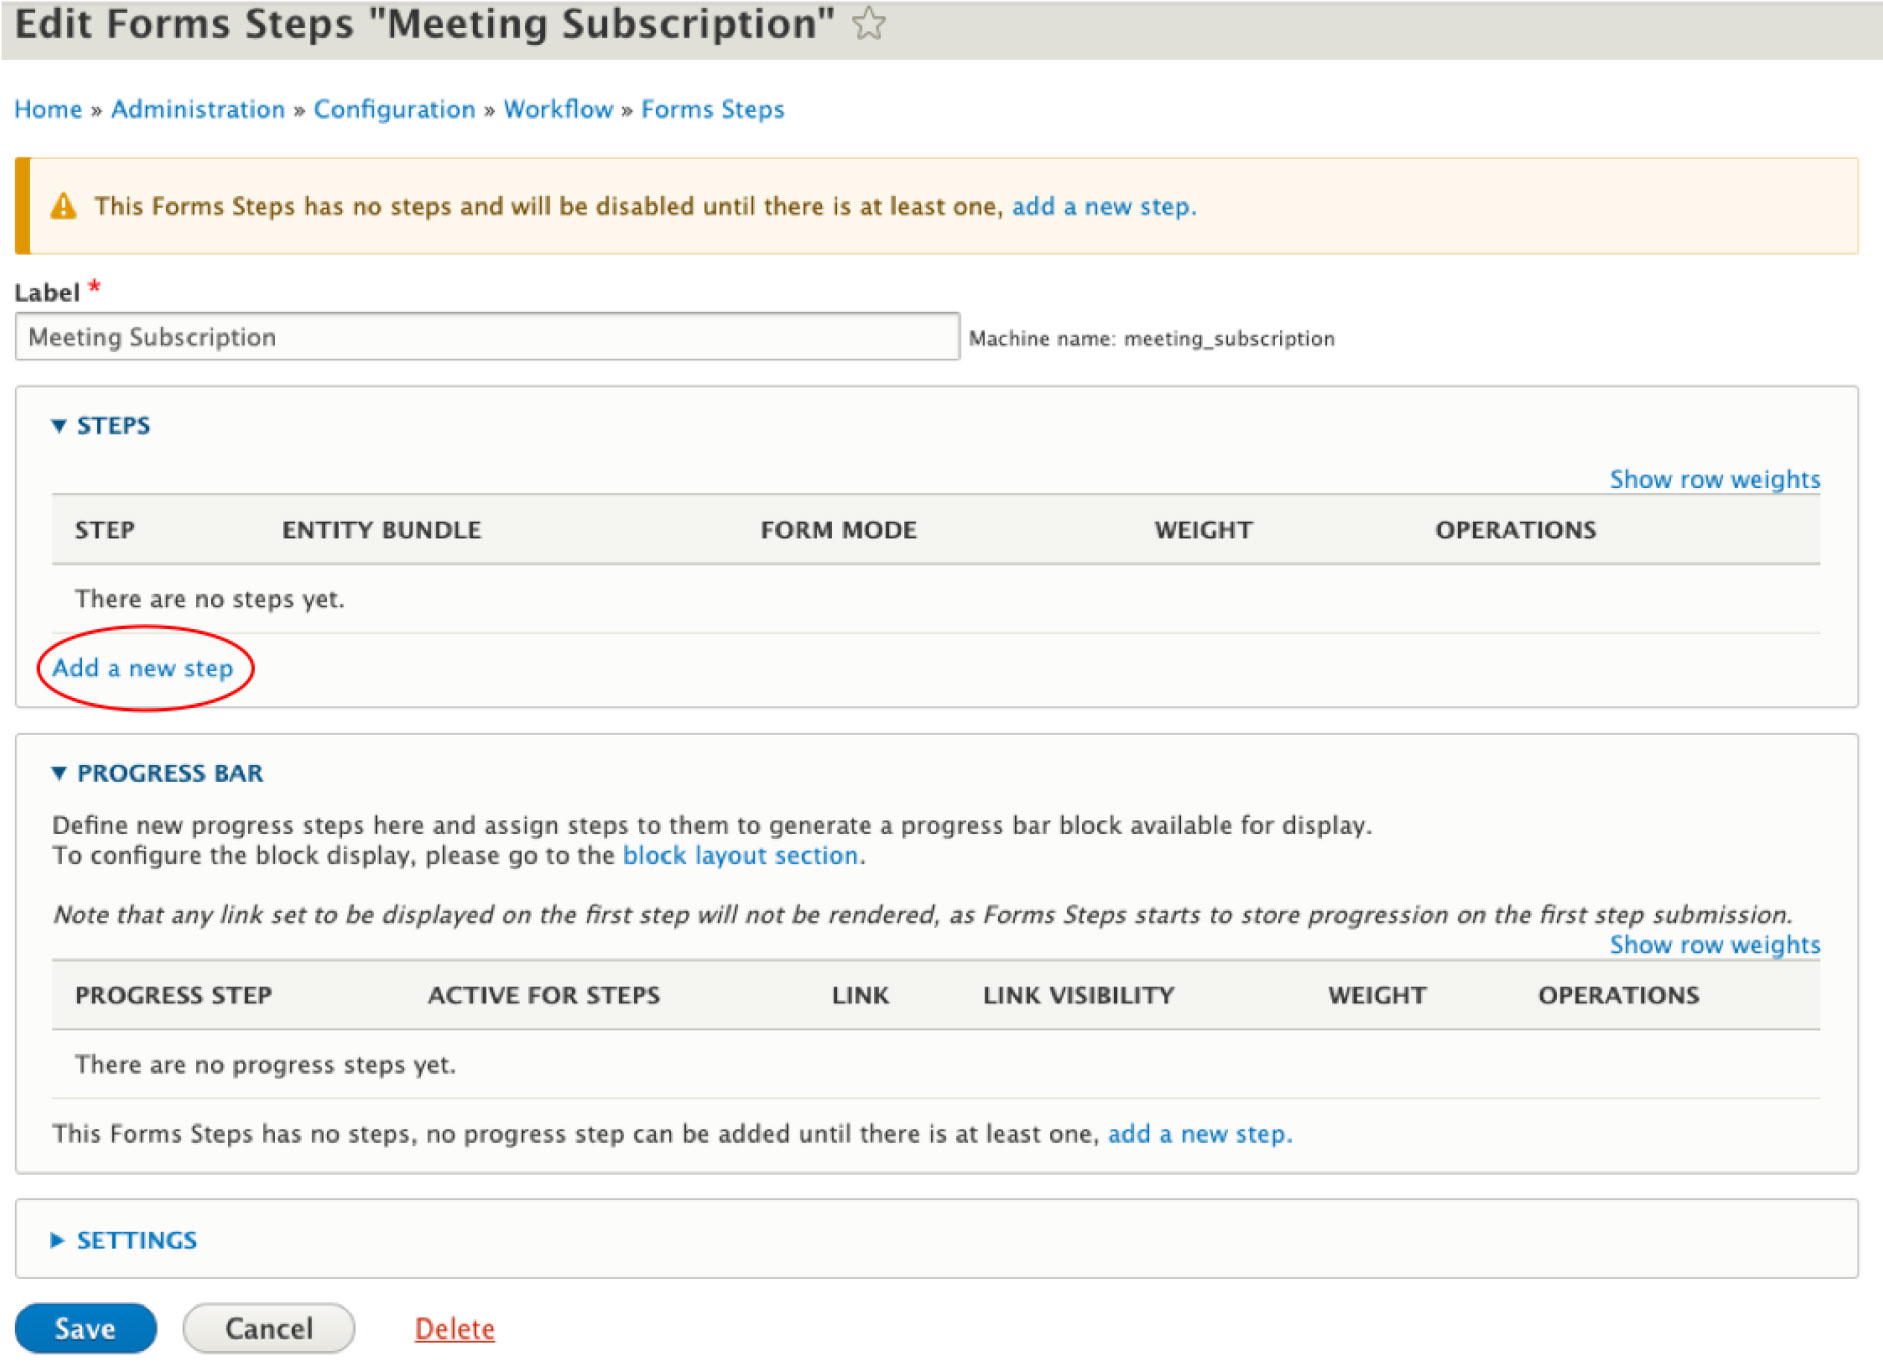
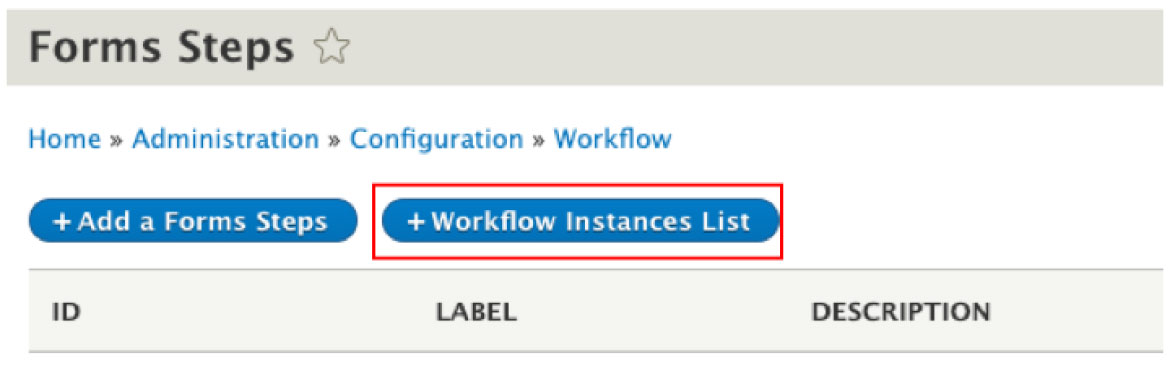
Configure Form steps
Go to Configuration > Workflow - Forms Steps > Add a Forms Steps
⇒ /admin/config/workflow/forms_steps/add
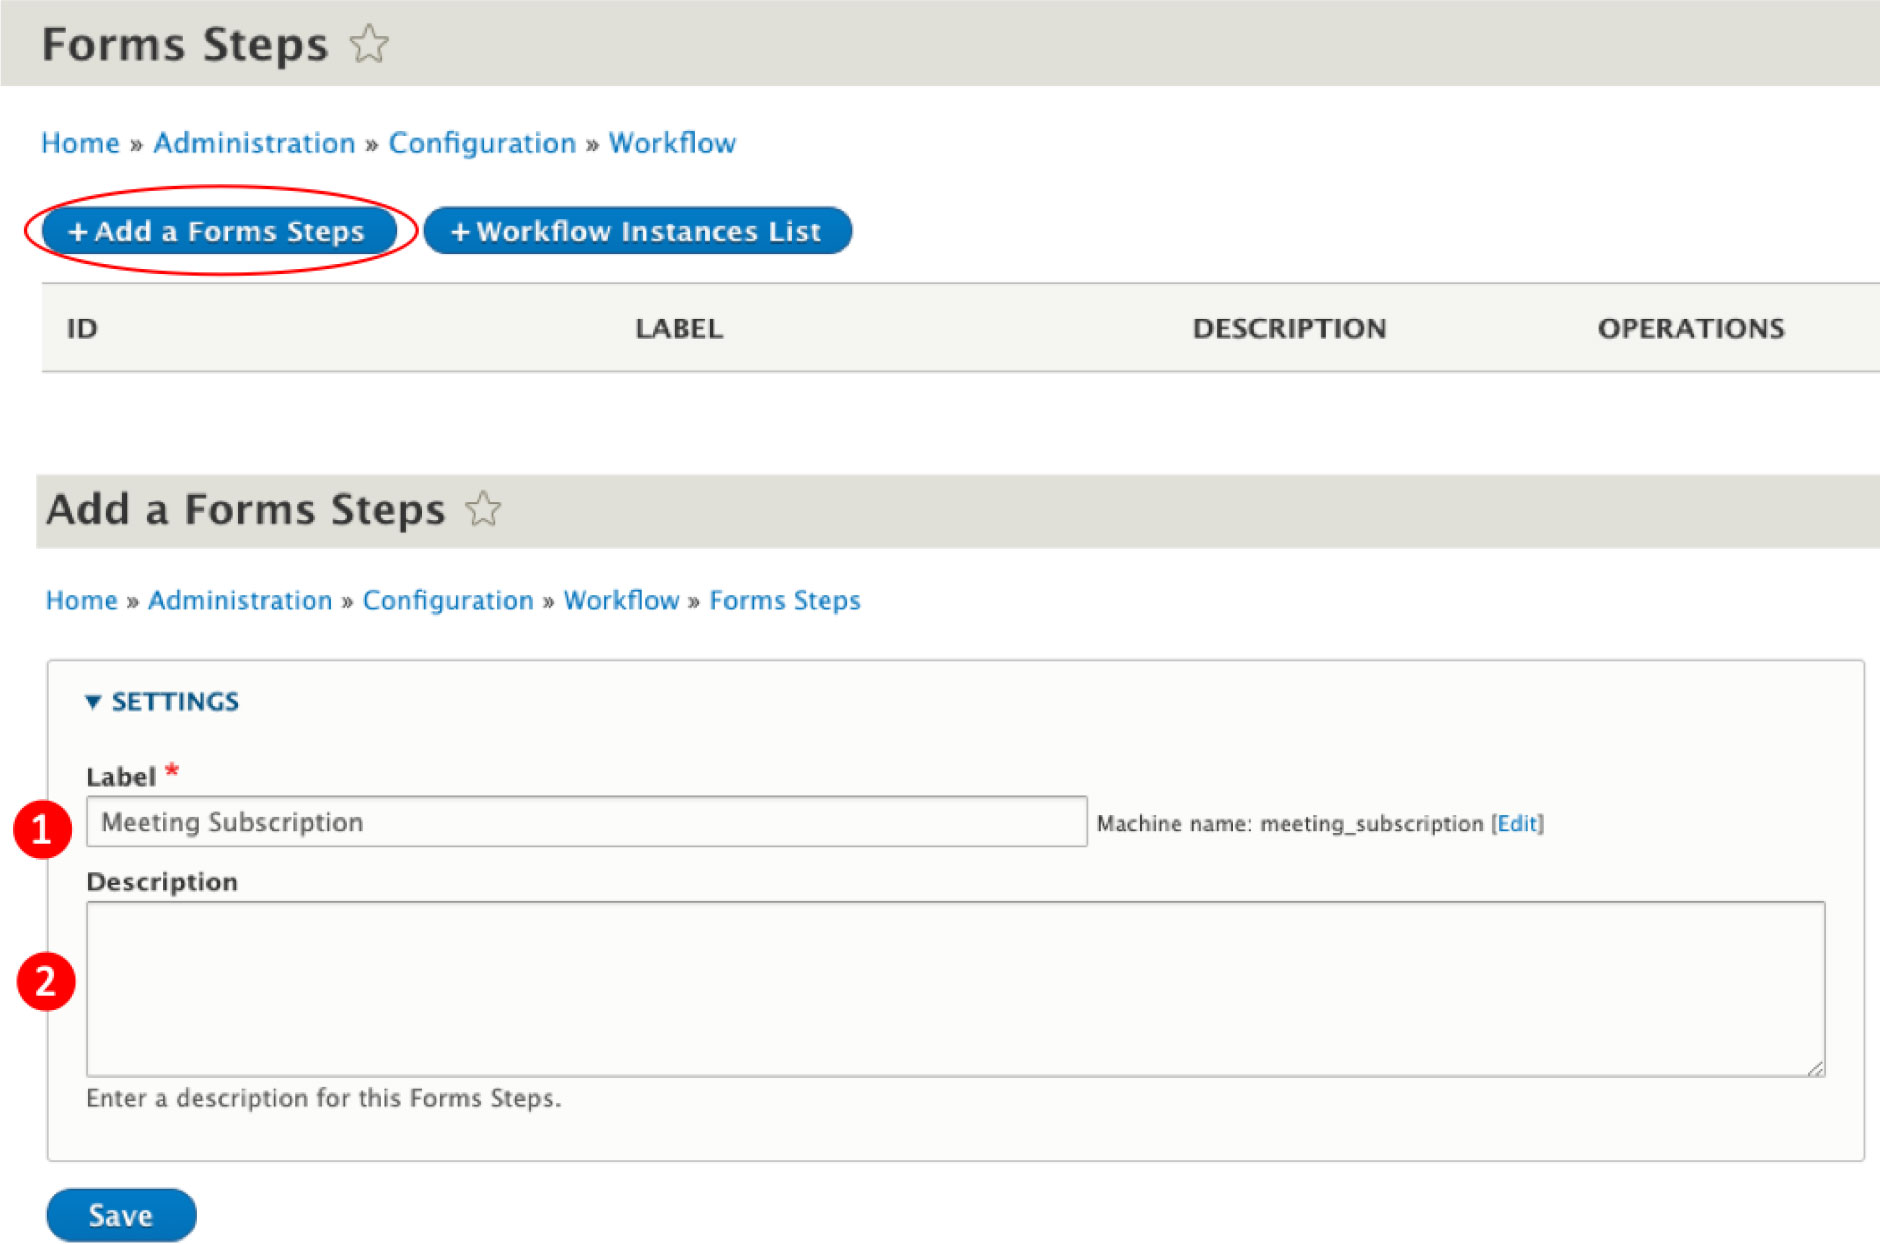
1 - Label : name of the form
2 - Description : this information will be displayed on the page listing the different form steps of the site
Add a new step
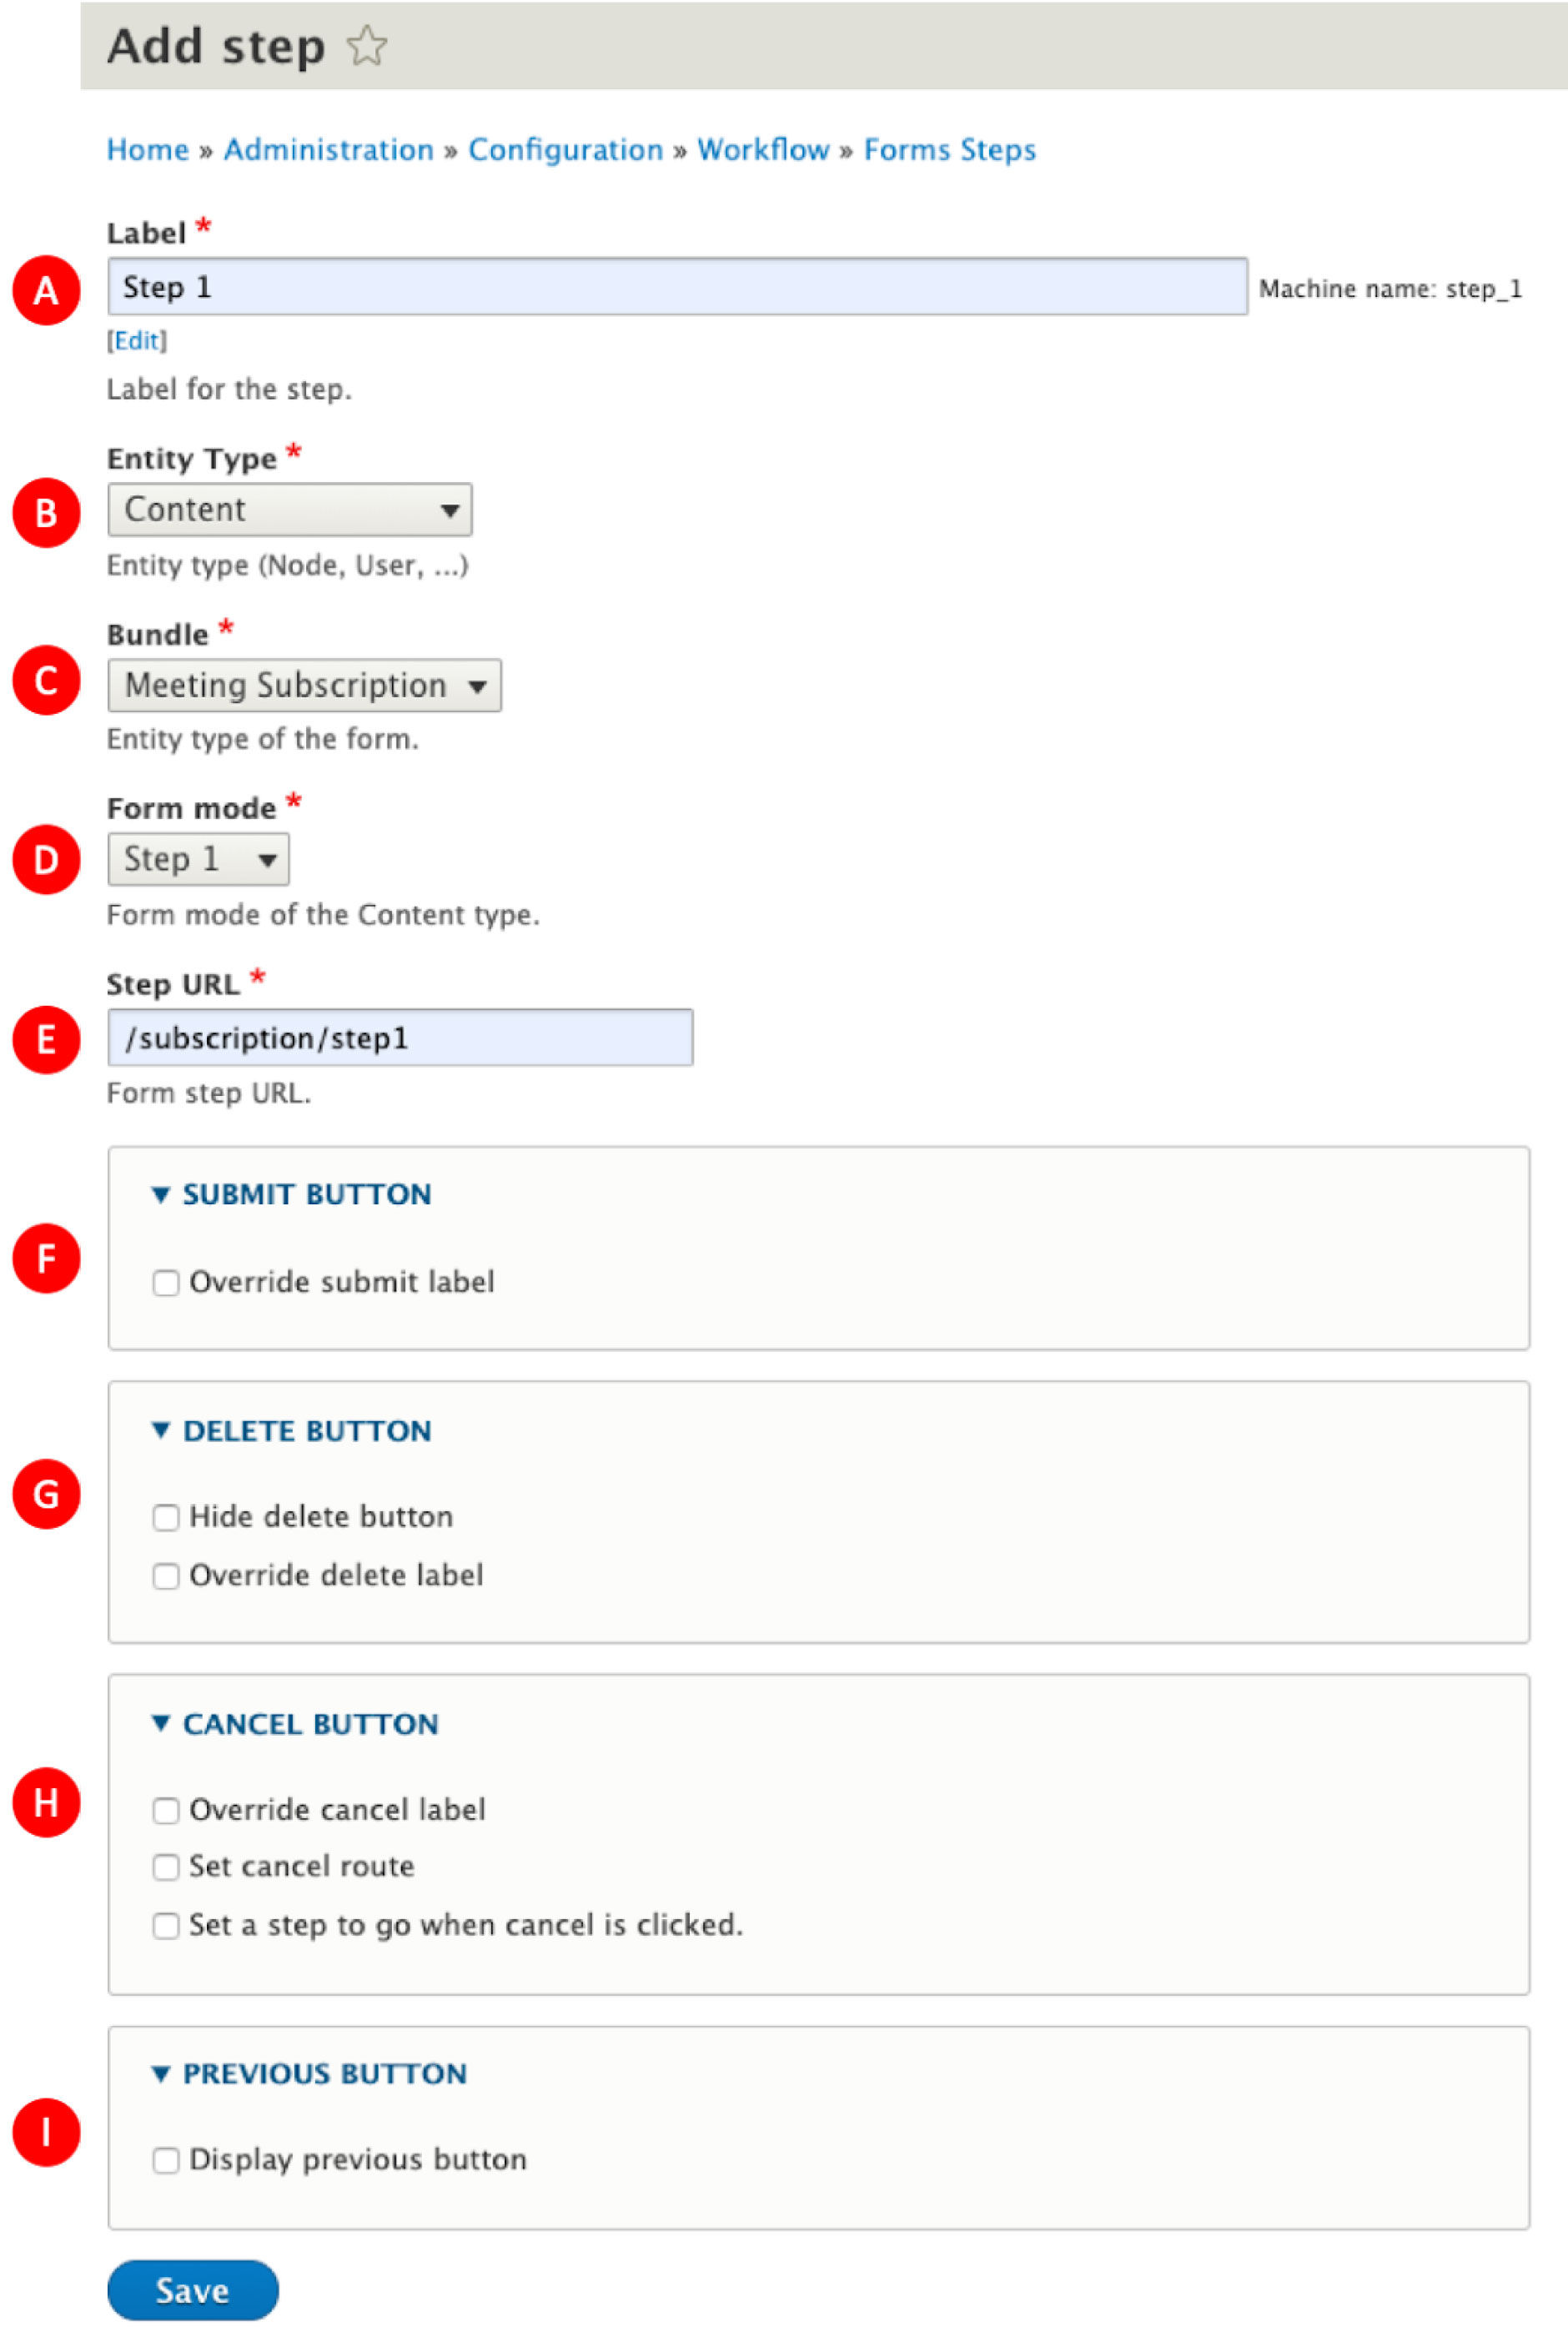
A - Label for the step : it is displayed as title of the step in front page.
B - Entity type : it must match the type of entity chosen in the form mode (in this example : “Content”)
C - Bundle : Content type related (in this example : “meeting subscription”)
D - Form mode : a list of previously created form modes
E - Step URL : the url that will be used to access this step from the front
F - Submit button : you can change the label of the submit button for the current step (for example, you can choose to put a button “next” for all the steps except the last one which will be called "submit") By default, the label is “Save”.
G - Delete button :
- you can hide this button by checking the first box
- you can change the label of the submit button for the current step by checking the second box and fill in the text field that appears
- this button is not available in the first step (because the content is not saved yet)
H - Cancel button :
- you can change the label of the submit button for the current step by checking the first box and fill in the text field that appears
- you can choose the cancel route for the current step by checking the second box
- or by checking the third box, you can choose which step to be redirected after clicking on the button
I - Previous button : you can display a previous button for the current step
Create a progress bar
You can generate a progress bar to follow the progression throughout the steps of the form. A block will be available for display.
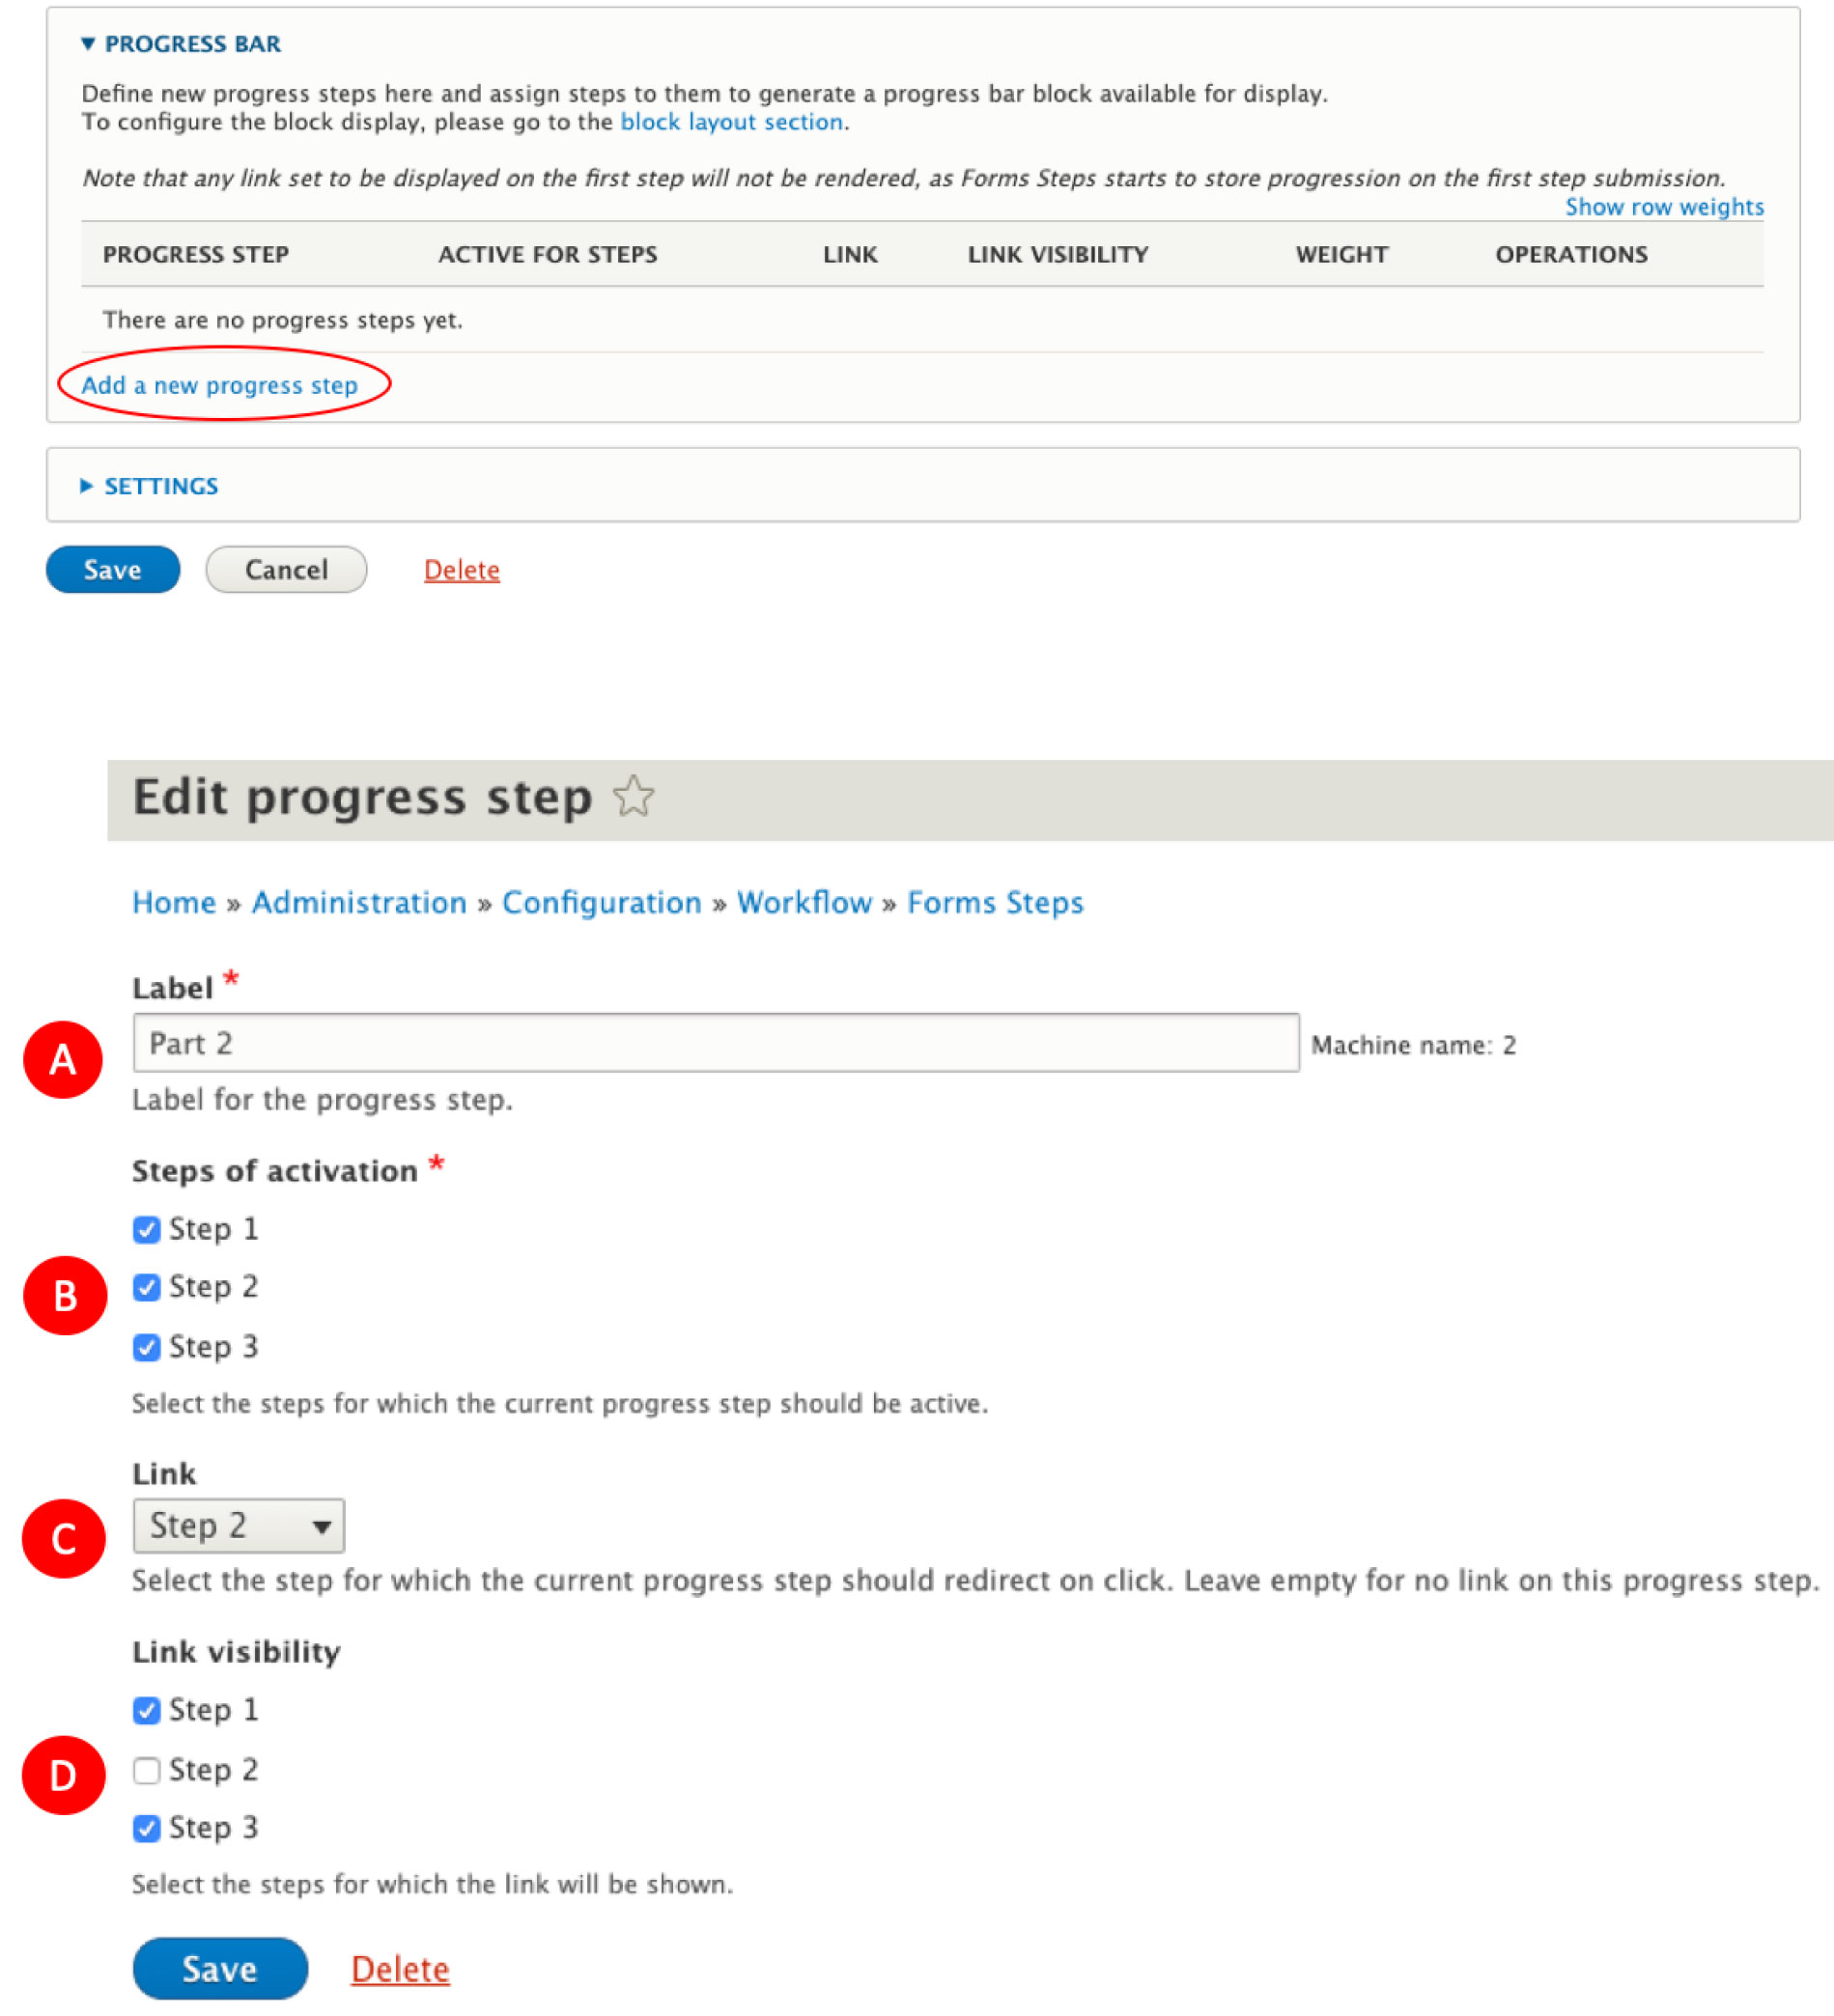
A - Label : The label display in the progress bar
B - Steps of activation : The steps for which this label will be displayed
C - Link : The step to which you are returned when you click on this link
D - Link visibility : The steps for which this label will be clickable (link activated)
In this example, the progress bar will display the link “Part 2” on Steps 1, 2, and 3.
The link will be active on step 1 and step 3.
Place a progress bar block
Then go to activate the block in the "block layout" part to display progress bar.
⇒ /admin/structure/block
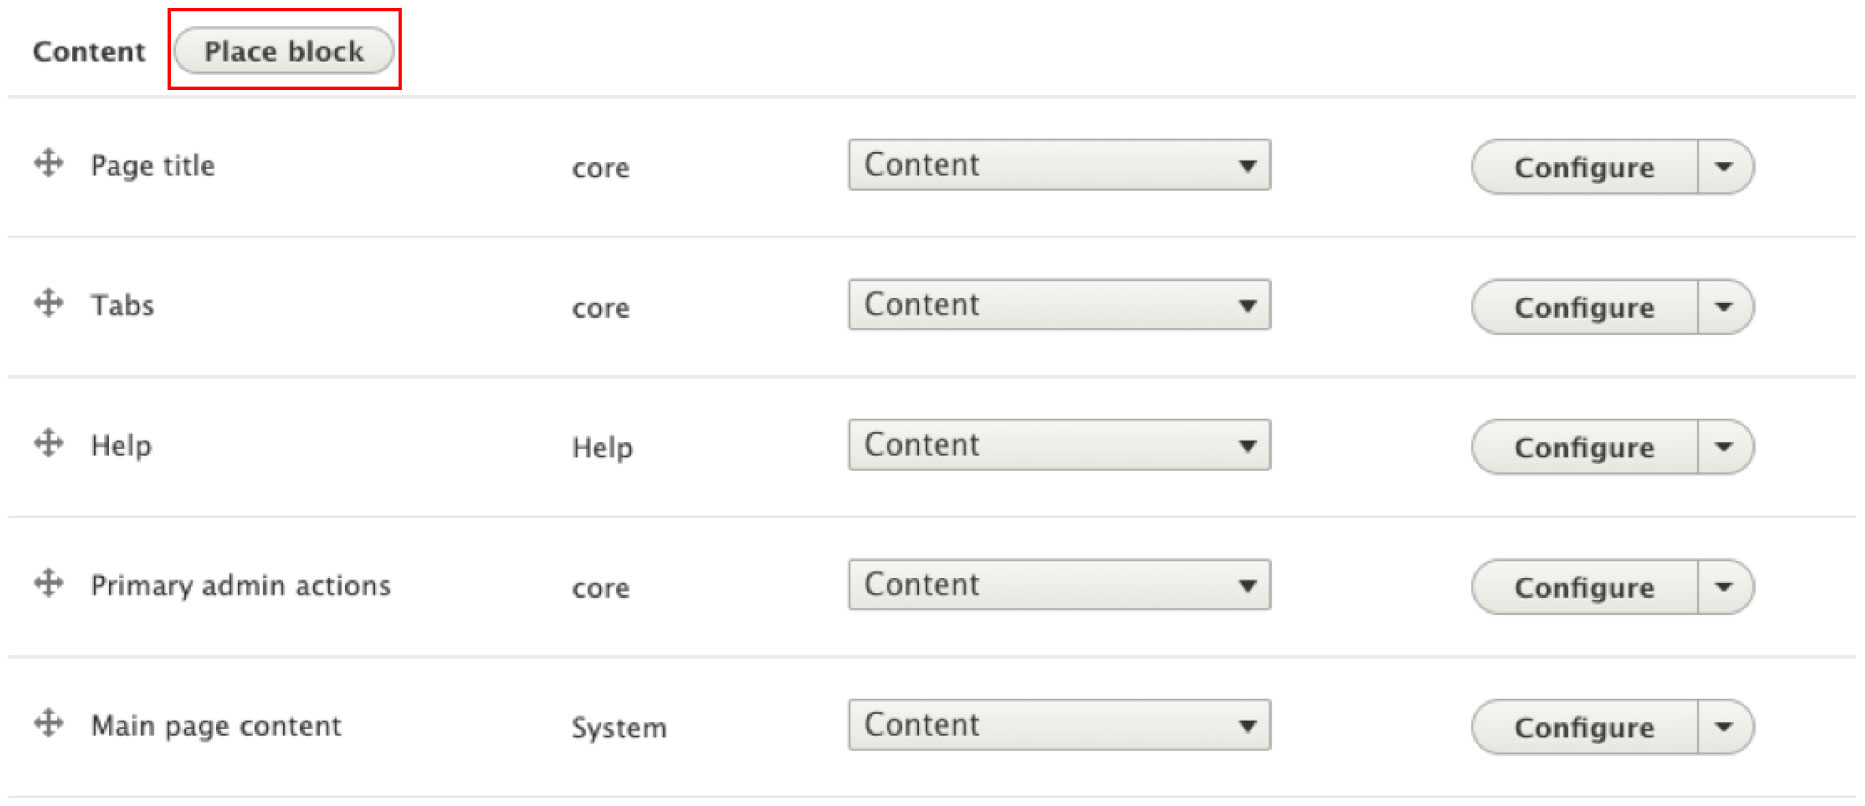
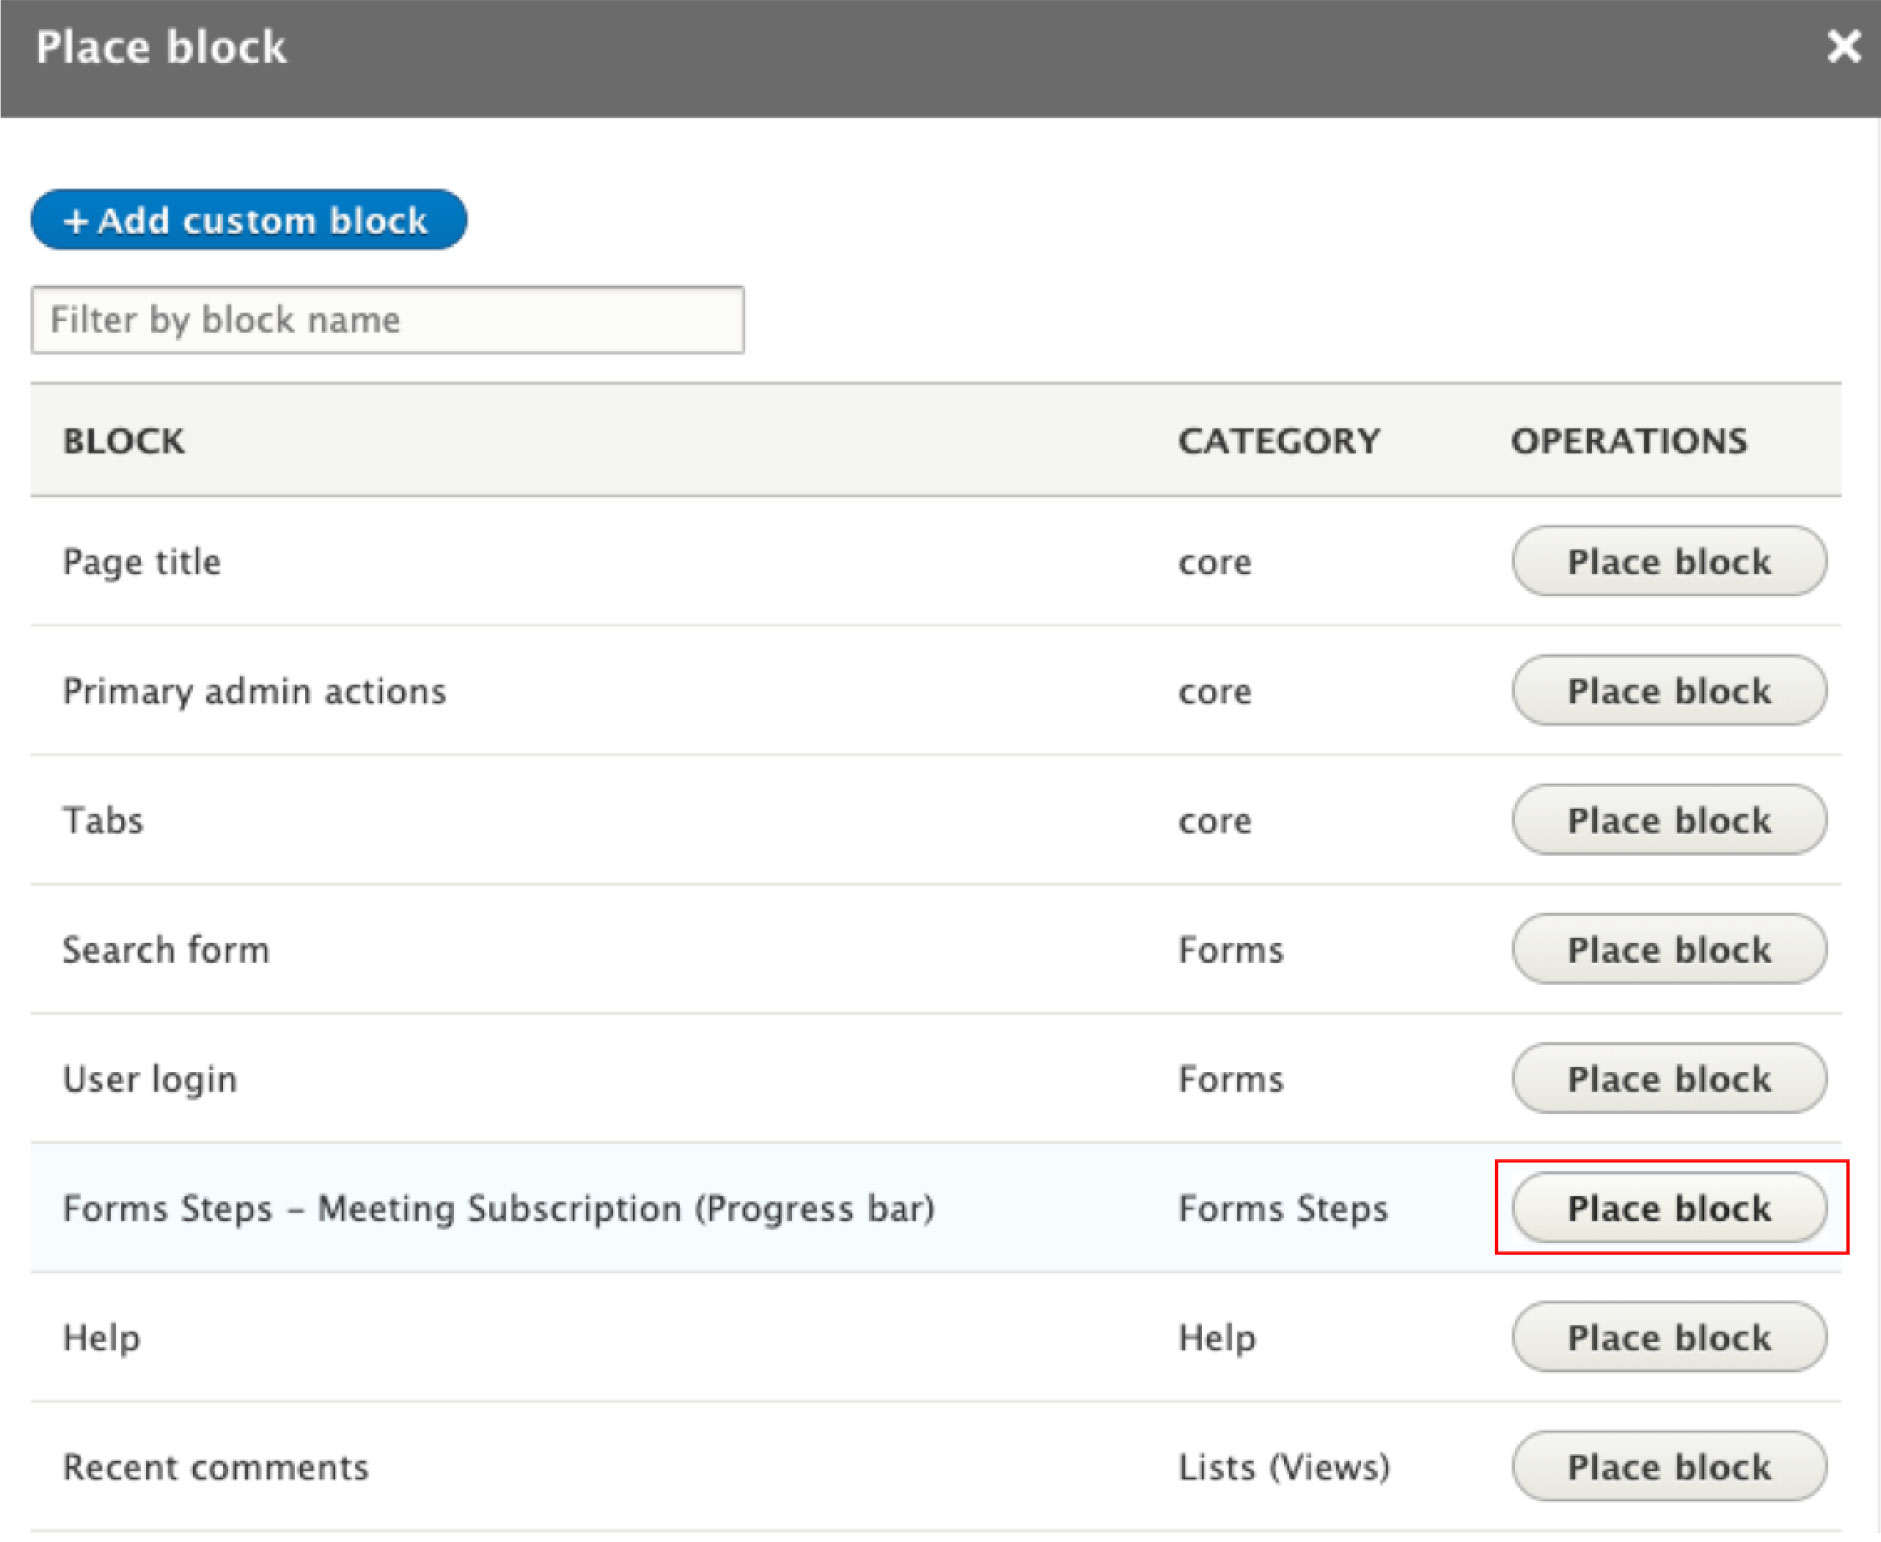
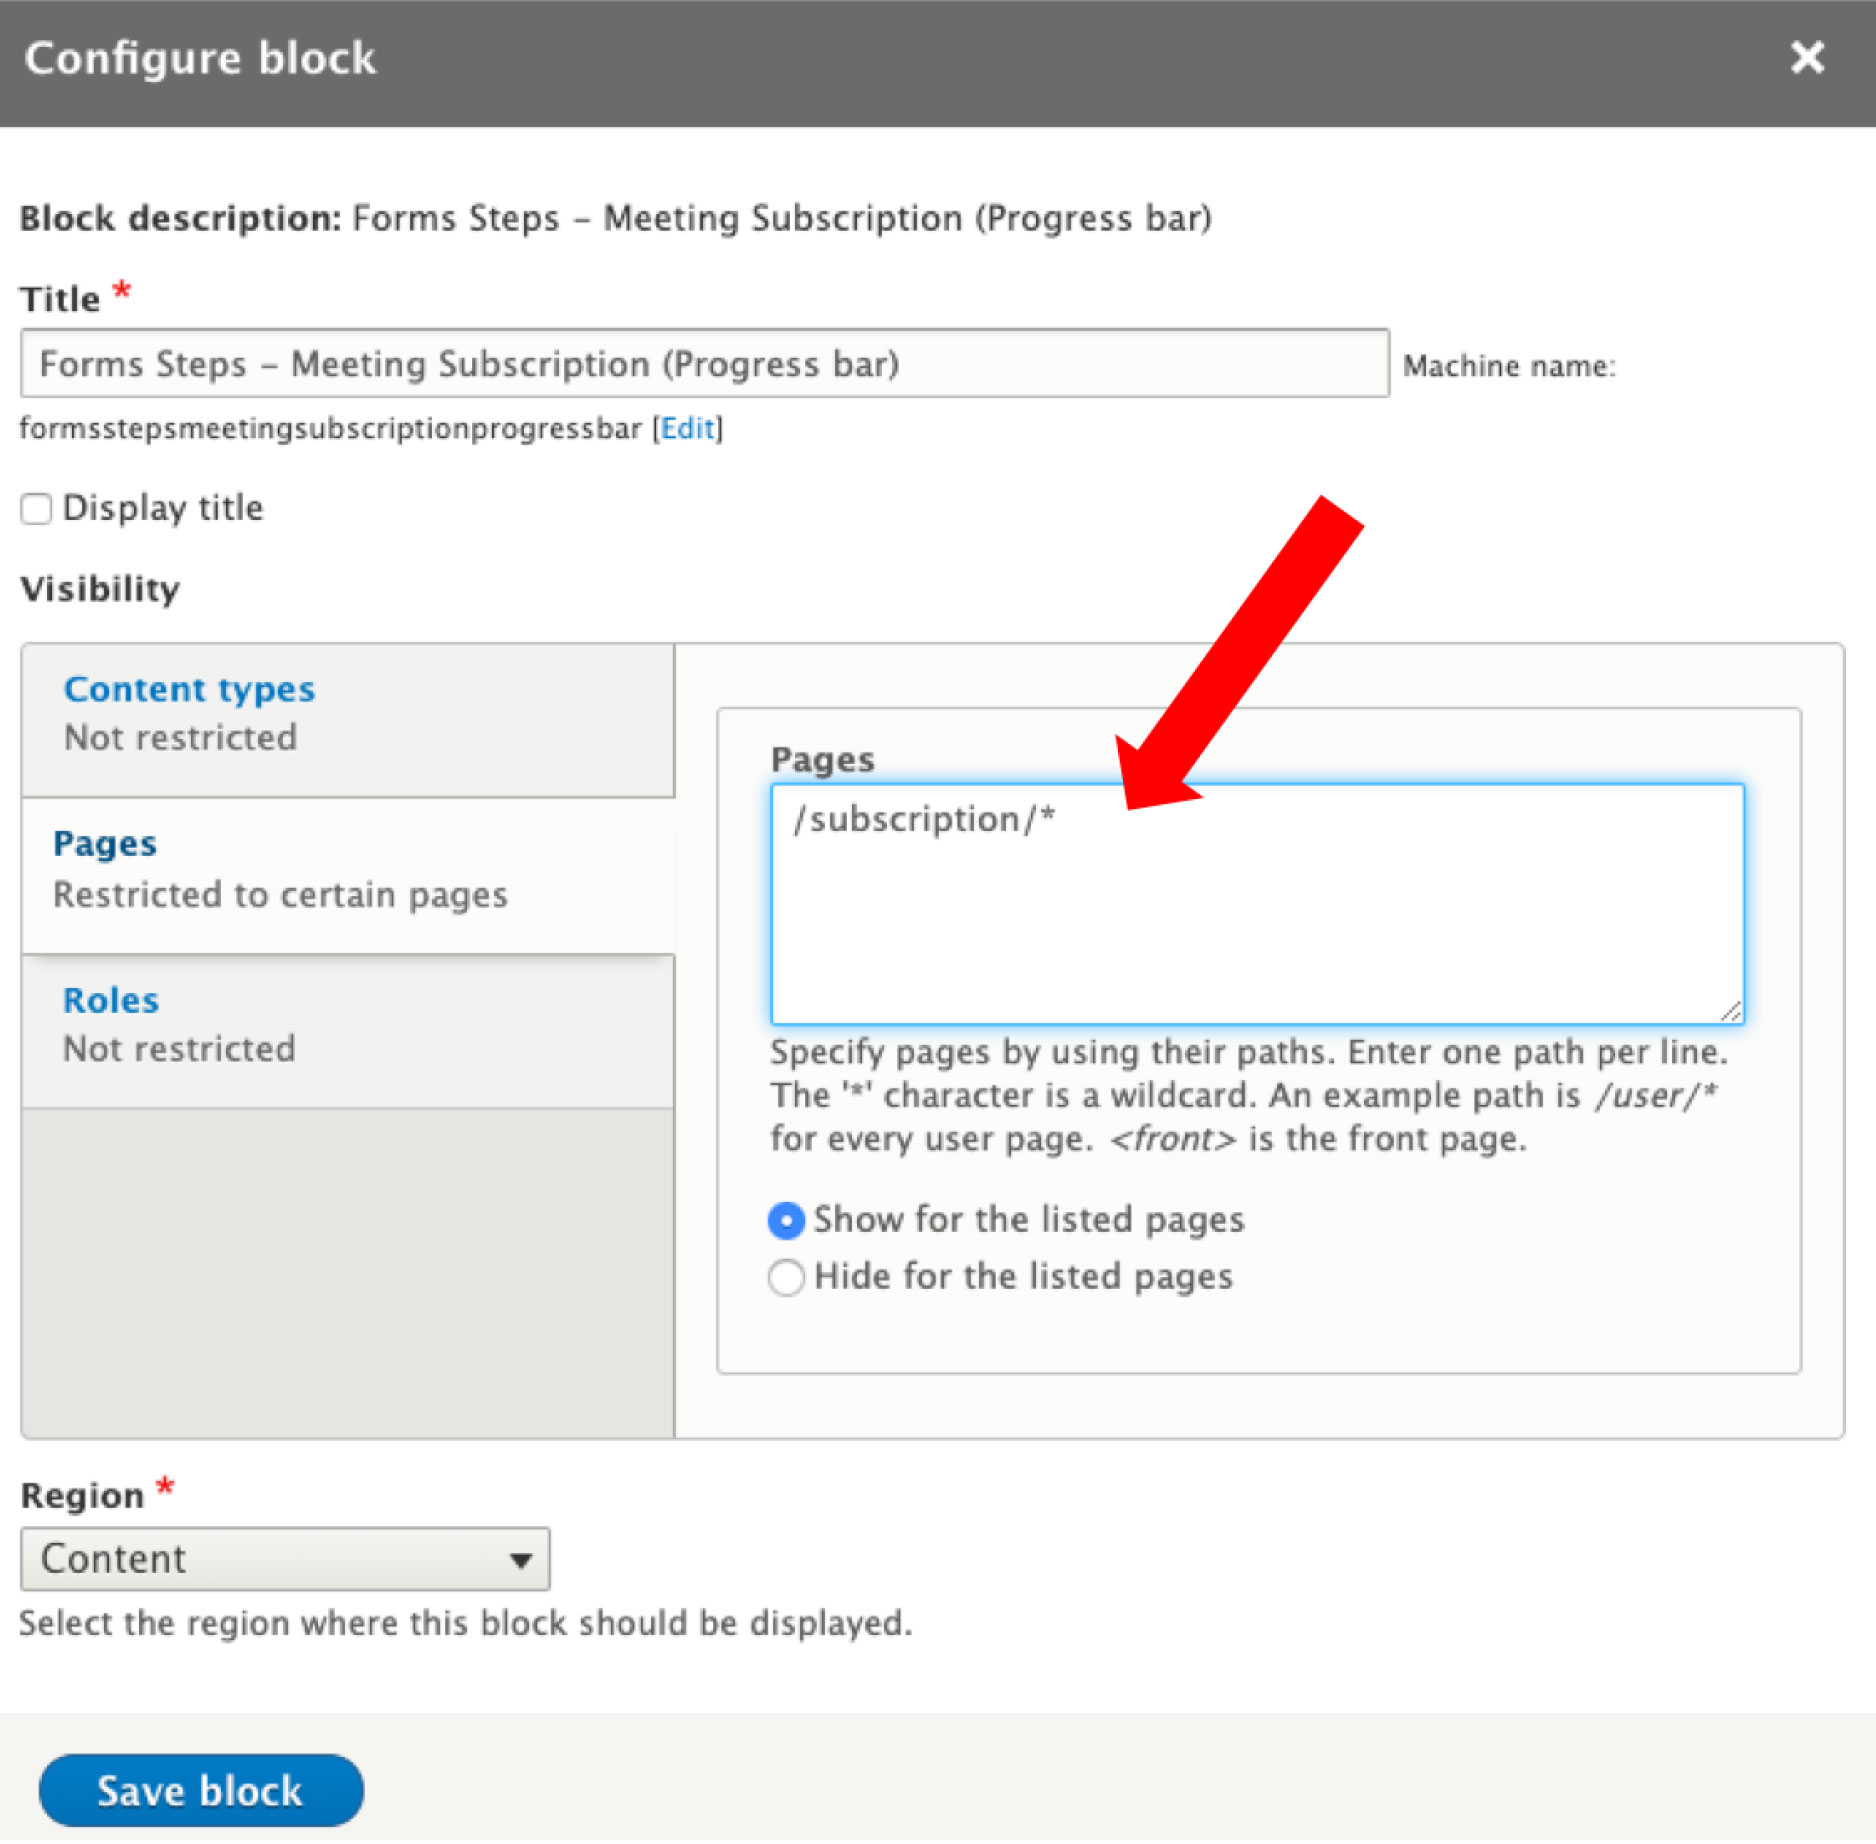
To display the "progress bar" block only on the steps of your form, you can fill in the urls of your steps in the block configuration.
Configure the redirection
Finally, you can choose to redirect the user after submission of the form.
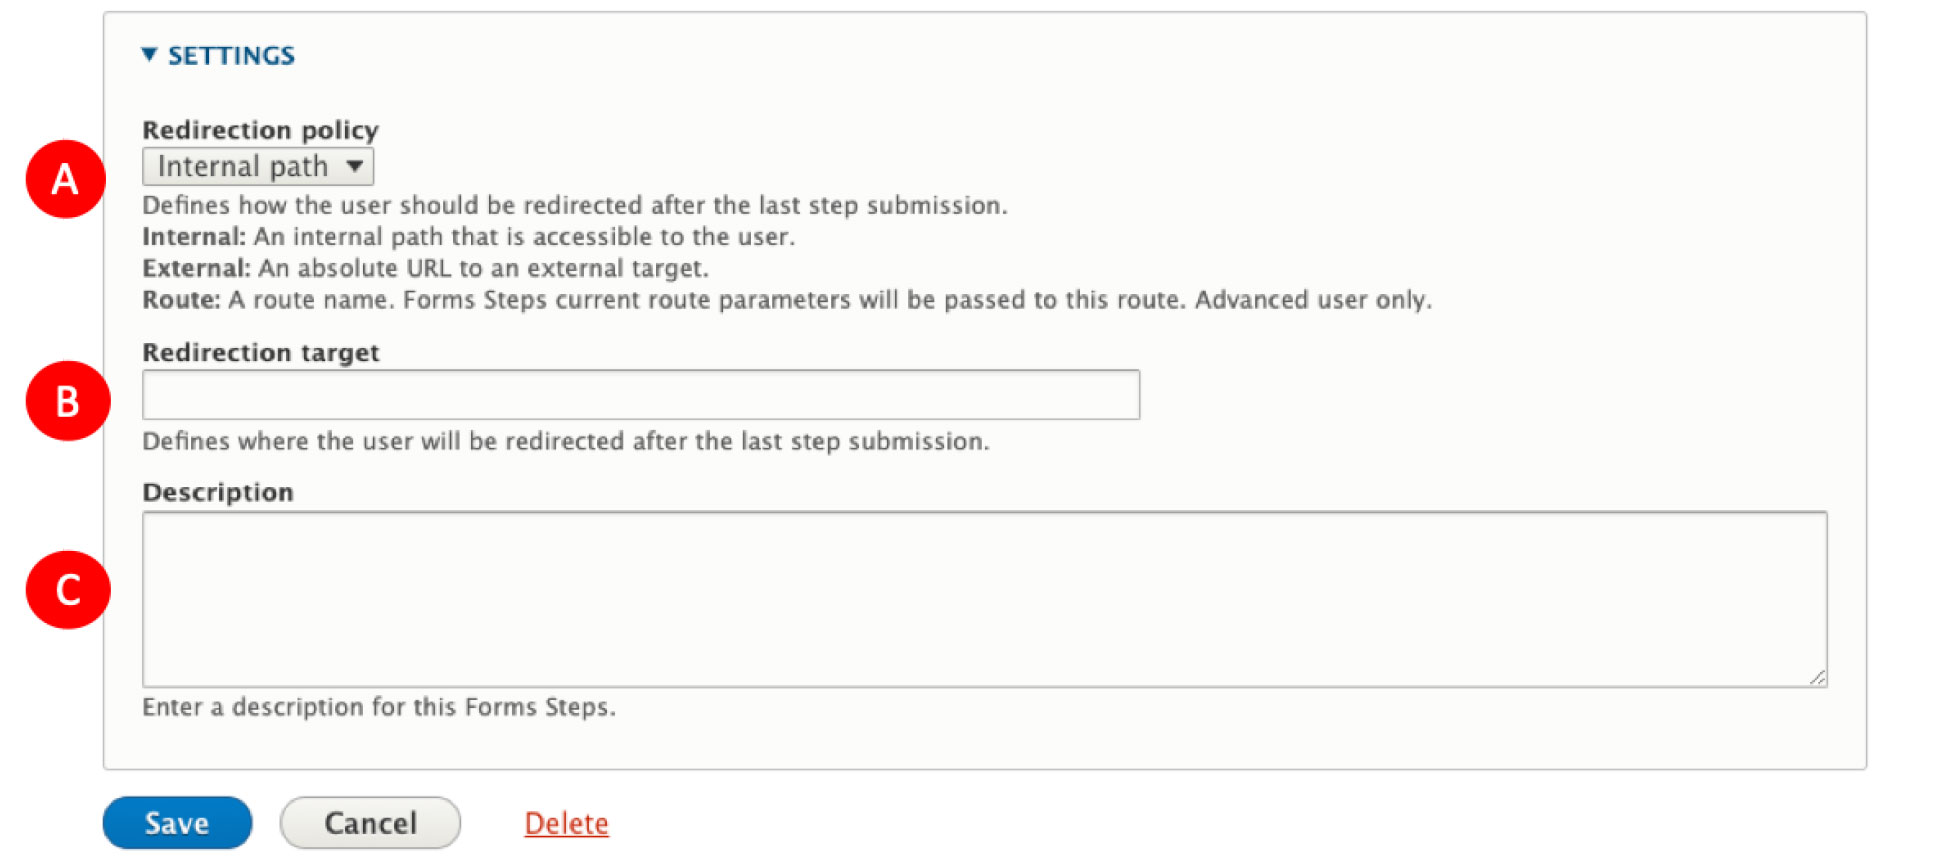
A - Redirection policy :
- none : by default, the user will stay on the last step of the form.
- internal path
- external path ( absolute URL)
- route name
B - Redirection target :
if you choose to change the default redirection, enter the url to which the user will be redirected
C- Description :
this information will be displayed on the page listing the different form steps of the site
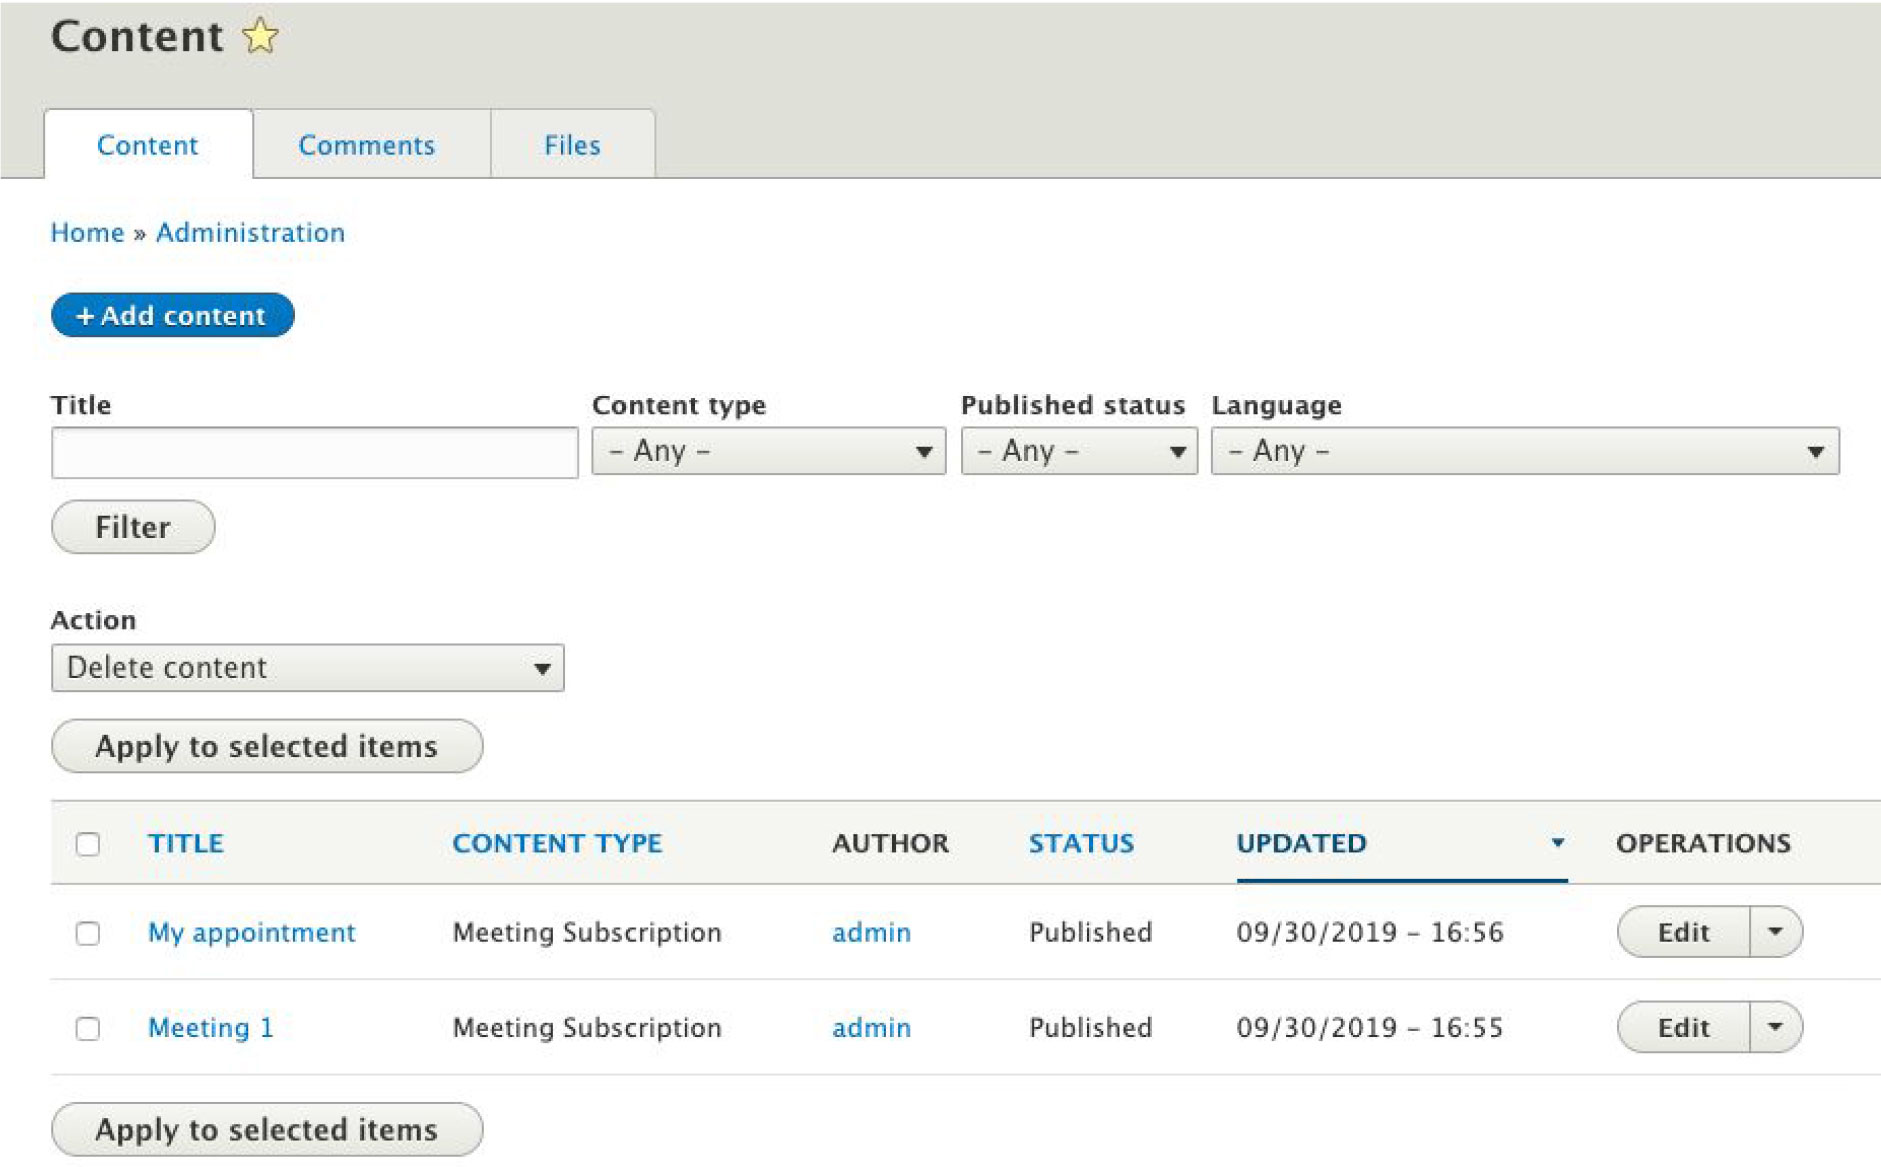
Access data
To access your form, simply go to the URL of the first step (in this example /subscription/step1)
The form data will be added as content directly into /admin/content
For example :
You can also see submissions in configuration page : /admin/config/workflow/forms_steps/workflows/list
Help improve this page
You can:
- Log in, click Edit, and edit this page
- Log in, click Discuss, update the Page status value, and suggest an improvement
- Log in and create a Documentation issue with your suggestion
