How to Create Custom APIs in Drupal
Overview:
Custom API is a Drupal 8+ compatible module that allows site administrators and developers to create and manage custom REST API endpoints without writing complex backend code. The module provides a structured and extensible approach to expose data from Drupal entities, database tables, and external services through custom REST routes built on top of Drupal’s REST and routing systems.
This module abstracts complex database queries, request handling, and response formatting, allowing you to focus on business logic and integrations while following Drupal coding standards and security best practices.
Watch this video to see how to create custom APIs in Drupal using the miniOrange Custom API module.
Installation steps (Composer):
- Download the module: Composer require 'drupal/miniorange_custom_api'
- Navigate to the Extend menu on your Drupal admin console and search for miniOrange Custom API using the search box.
- Enable the module by checking the checkbox and clicking on the install button.
- Configure the module at
{BaseURL}/admin/config/people/custom-api
Configuration steps:
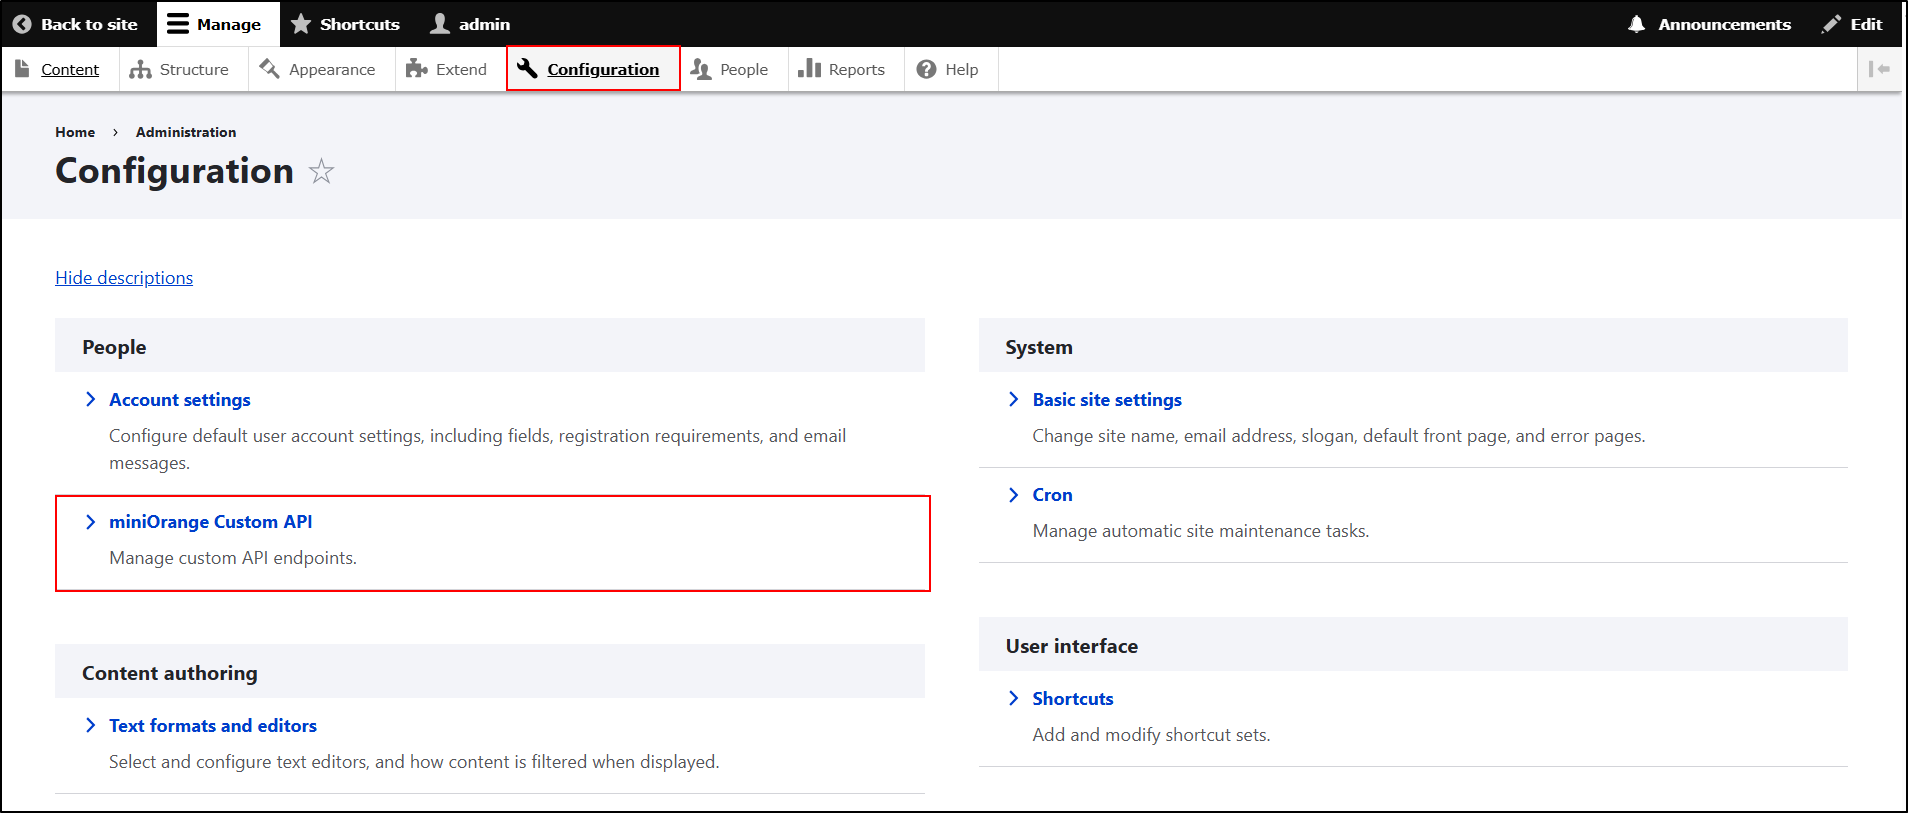
- After installing the module on your Drupal site, navigate to Administration → Configuration → People → miniOrange Custom API (/admin/config/people/custom-api).
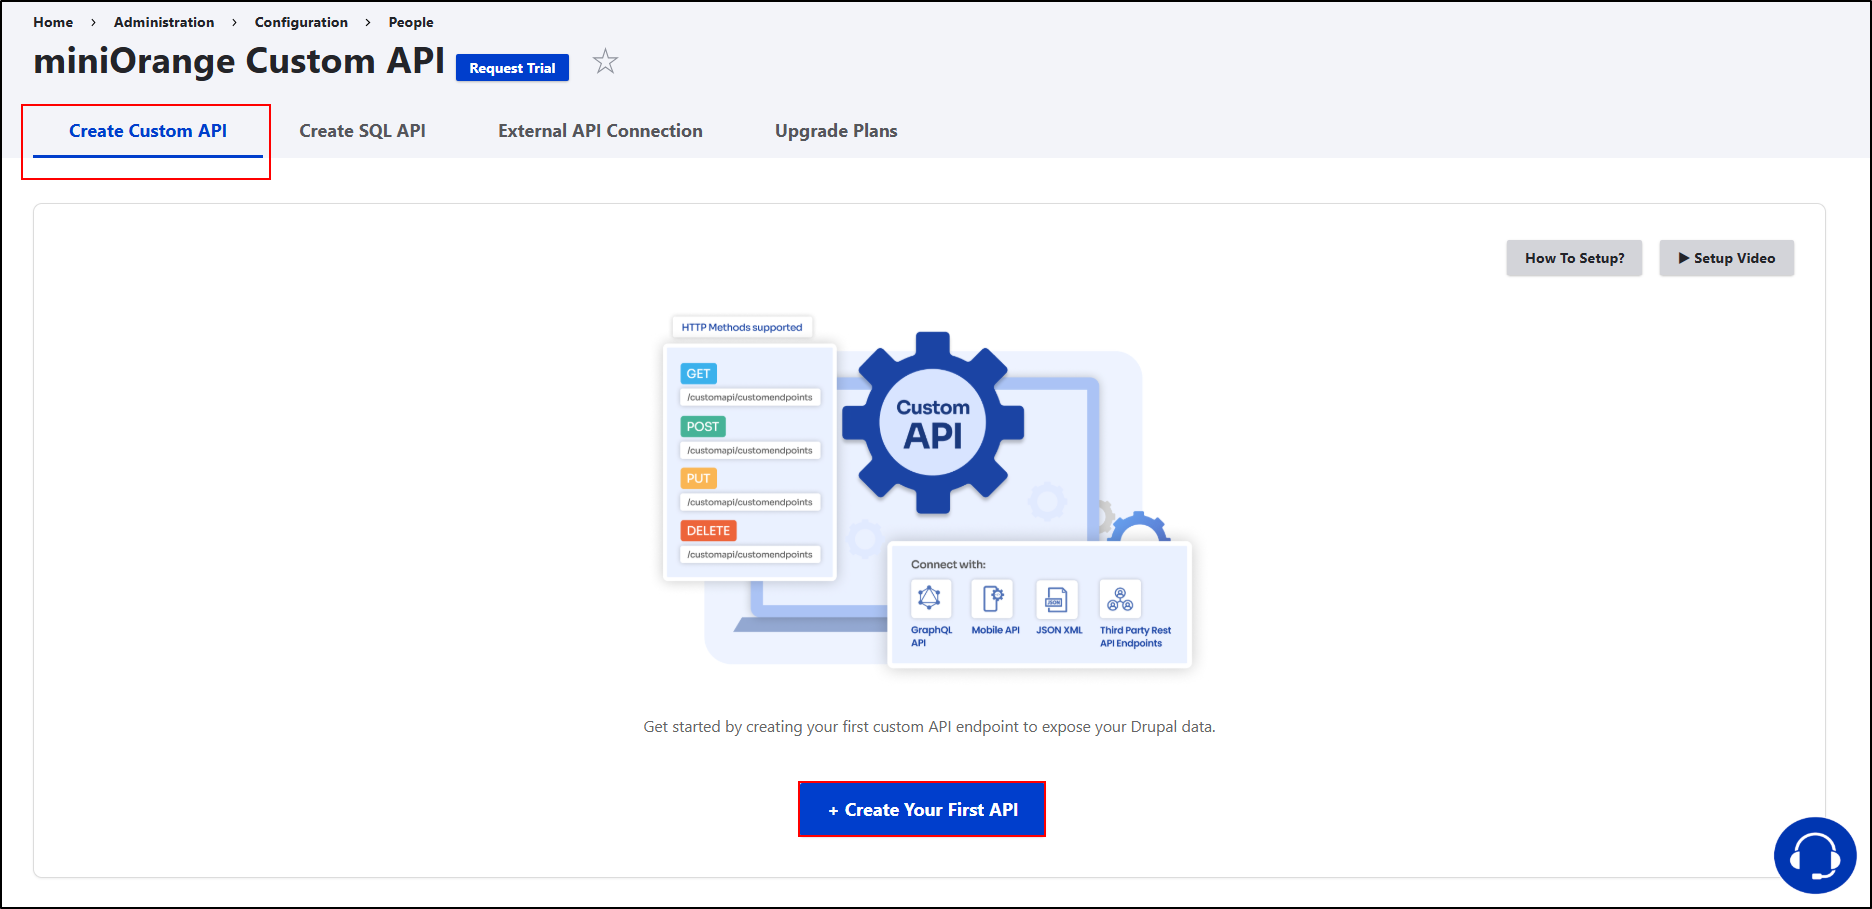
- Under the Create Custom API tab, click the Create Your First API button.
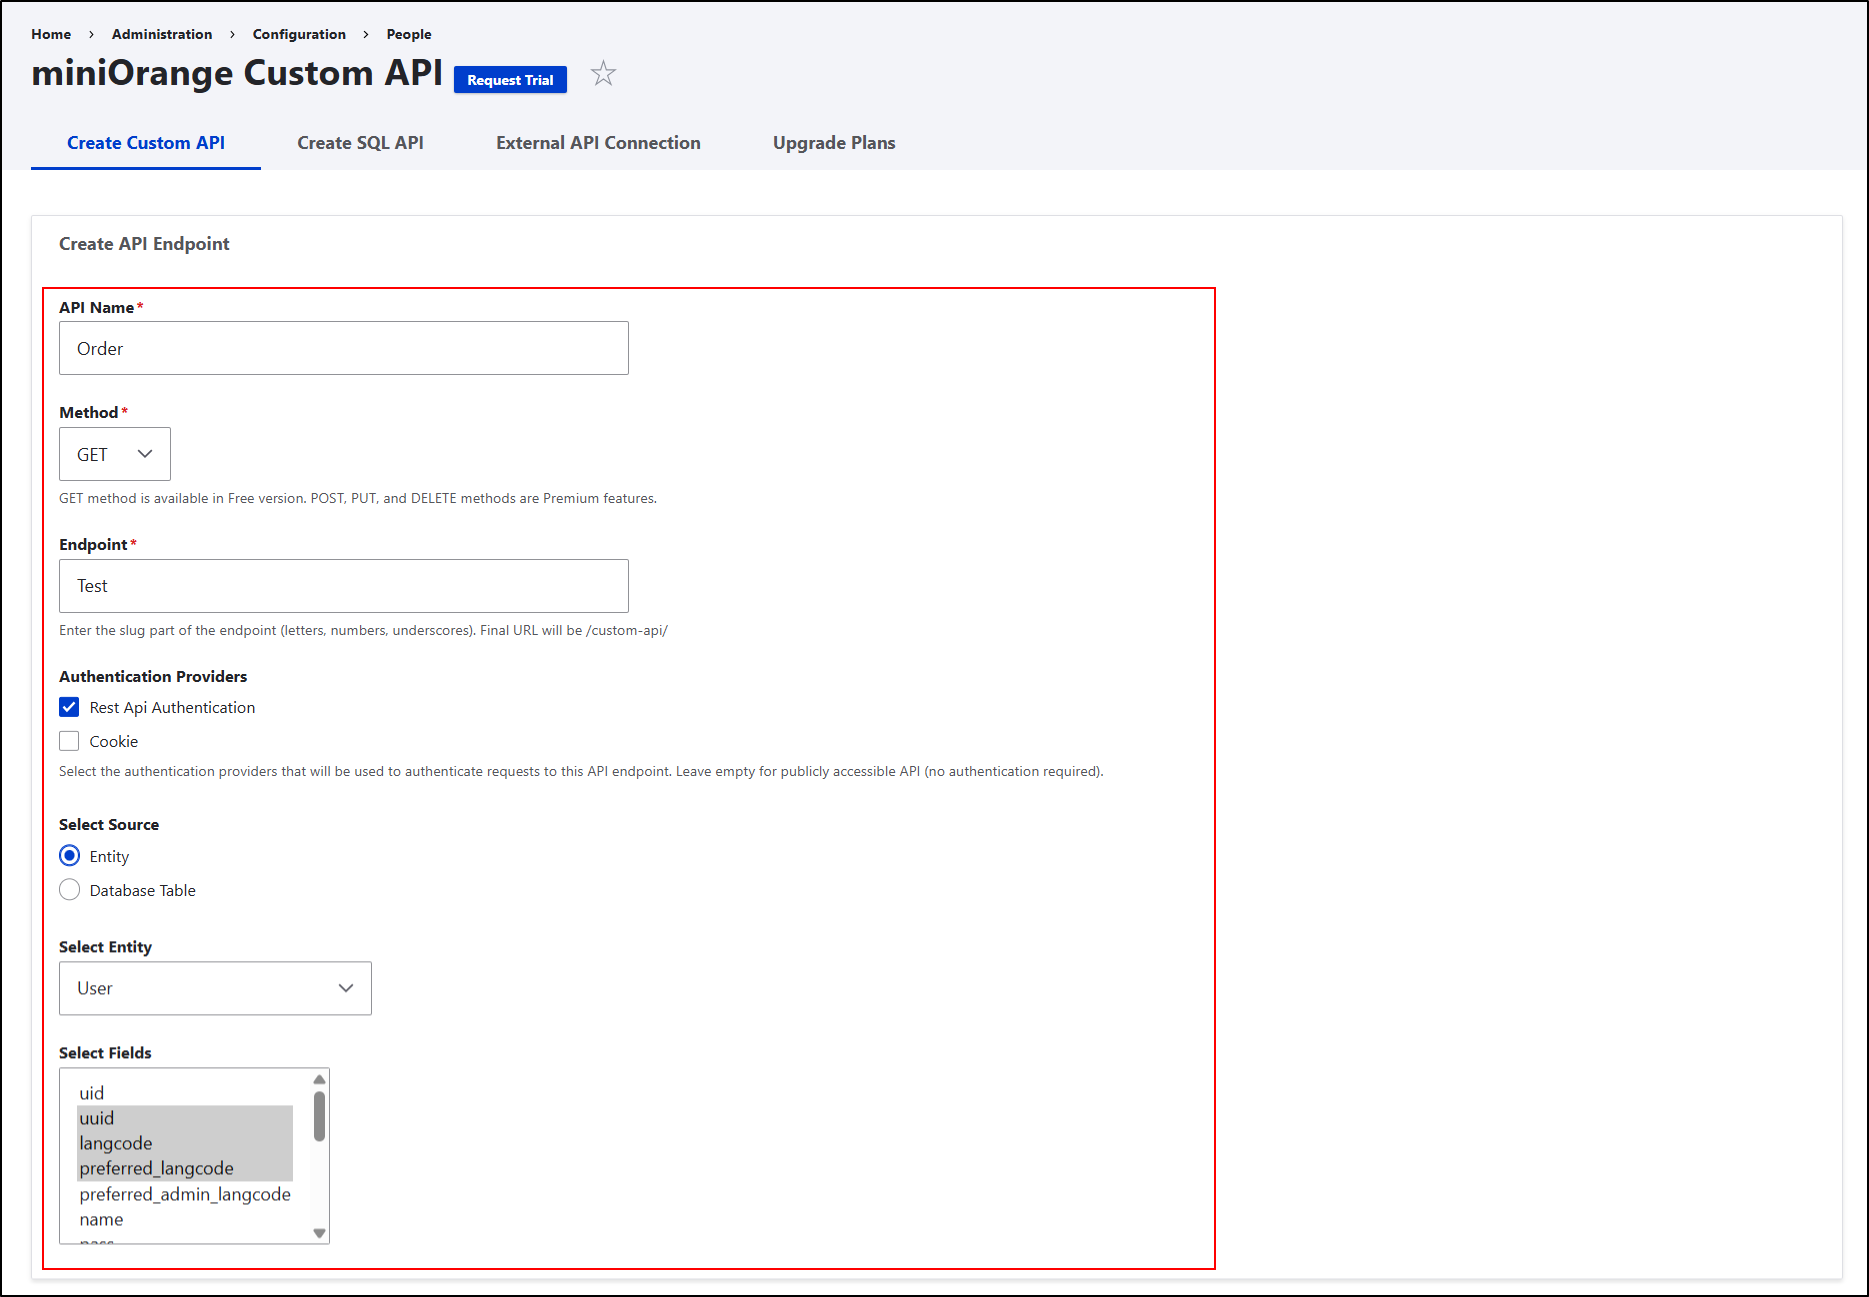
- Under Create API Endpoint, fill in the following details:
- API Name: Enter the name for your API (for example, Order).
- Method: Select the HTTP method for the API. (GET is available in the Free version. POST, PUT, and DELETE are available in Premium versions.)
- Endpoint: Enter the endpoint slug (letters, numbers, or underscores only).
- This will be appended to /custom-api/.
- Example: If you enter test, the final API URL will be: {base_url}/custom-api/test.
- Authentication Providers: Choose how the API should be authenticated:
- REST API Authentication: Secure the API using token-based authentication.
- Cookie: Uses Drupal session-based authentication.
- HTTP Basic: Use Drupal’s HTTP Basic authentication.
- Leave them unchecked to make the API publicly accessible.
- Select Source: Choose the source from where data will be fetched:
- Entity: Fetch data from Drupal entities (nodes, users, etc.).
- Database Table: Fetch data directly from database tables.
- After selecting Entity/Database Table, choose the required entity/table type from the Select Entity/DatabaseTable dropdown.
- Next, select the respective entity/Database columns you want to be included in the API.
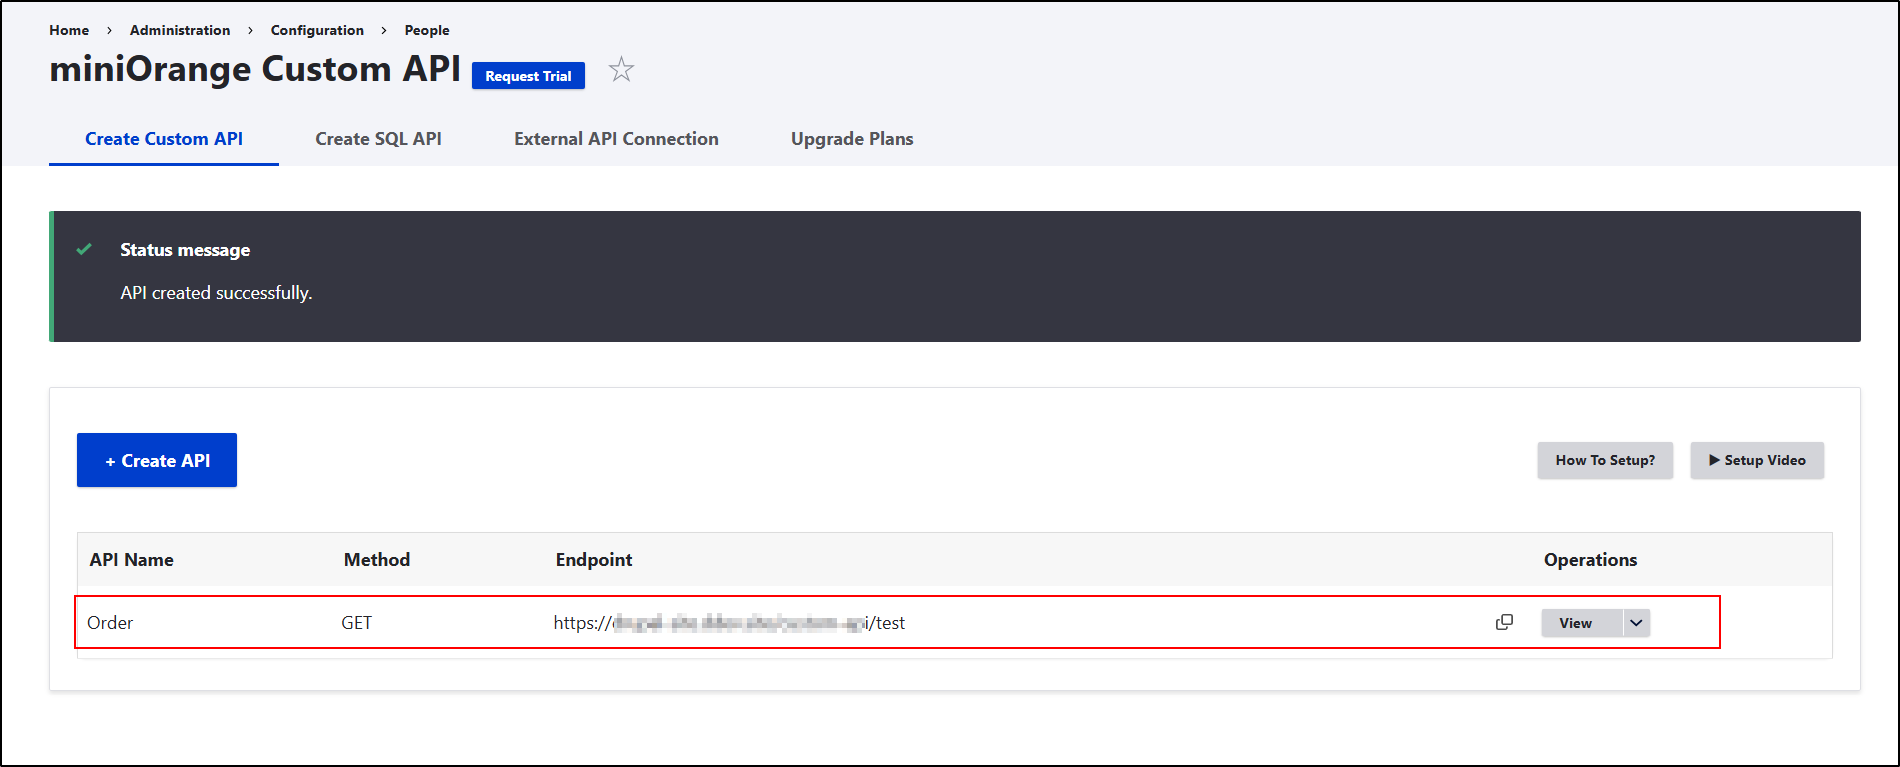
- Click Save API to create the Custom API endpoint.
- Once the API is created, a success message is displayed, and your api is created.
- Copy the created Endpoint URL.
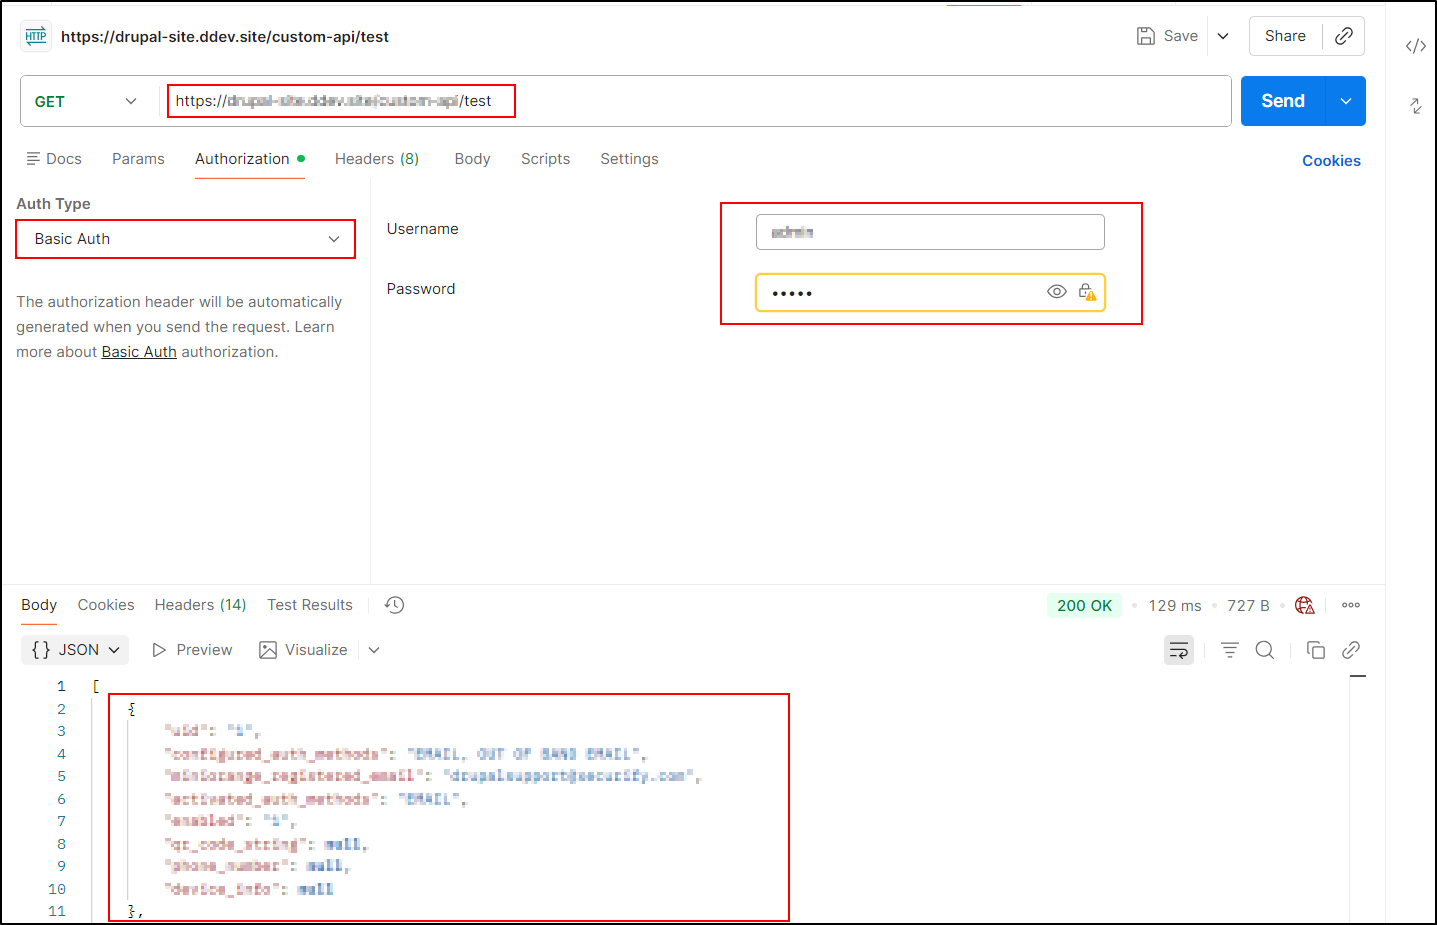
How to Test the Custom API Using Postman:
- Open the Postman application.
- Click New → HTTP Request.
- Select the HTTP method used while creating the API. For example, GET.
- Paste the copied API endpoint URL in the request URL field.
- Under the Authorization tab, as per your authentication provider, select Auth Type, for example, select Basic Auth, as we’ve configured basic authentication in the rest api authentication module.
- Enter your Drupal credentials: username and password.
- Click the Send button.
- Postman will request the API endpoint.
- A successful request returns a 200 OK status.
- It will return the response that you want in your custom API.
That’s it! You have successfully configured a Custom API in Drupal.
Help improve this page
You can:
- Log in, click Edit, and edit this page
- Log in, click Discuss, update the Page status value, and suggest an improvement
- Log in and create a Documentation issue with your suggestion
